Creating a New Webpage
This is a tutorial built on top of Creating a New Server. If you aren't sure how our backend works, we recommend checking that link out first!
All of our webpages on Core-v4 are organized under the src/Pages directory. Clicking on the link, you should see the below layout
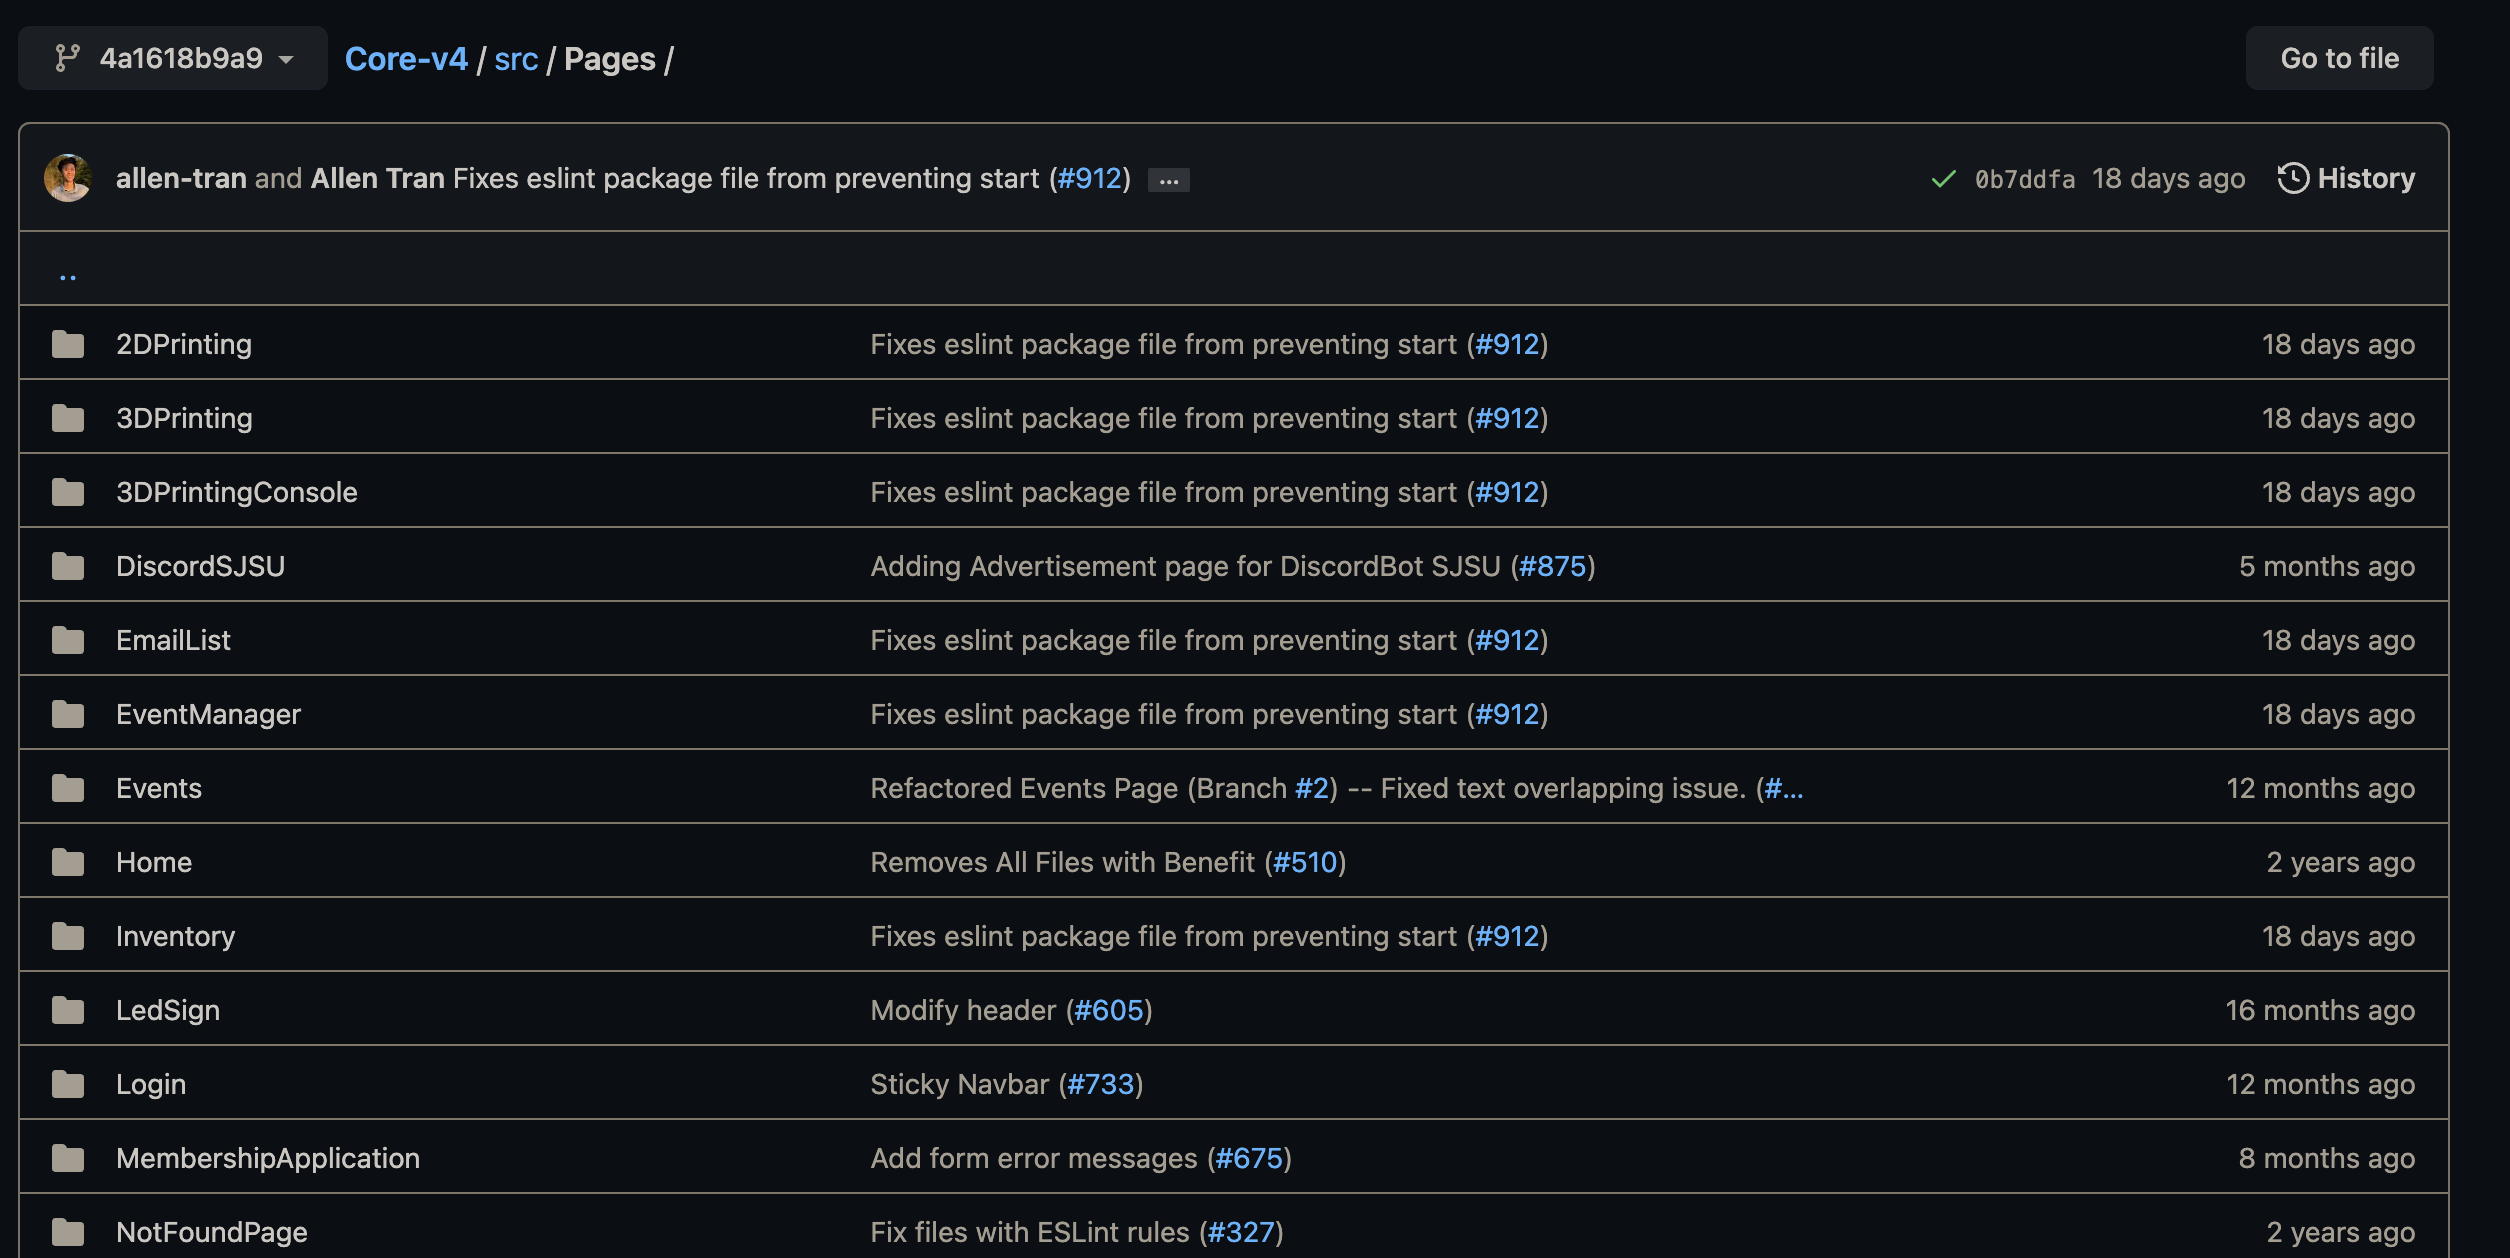
In short, to create a webpage on Core-v4, we create a folder in the above directory which contains all related React and CSS files.
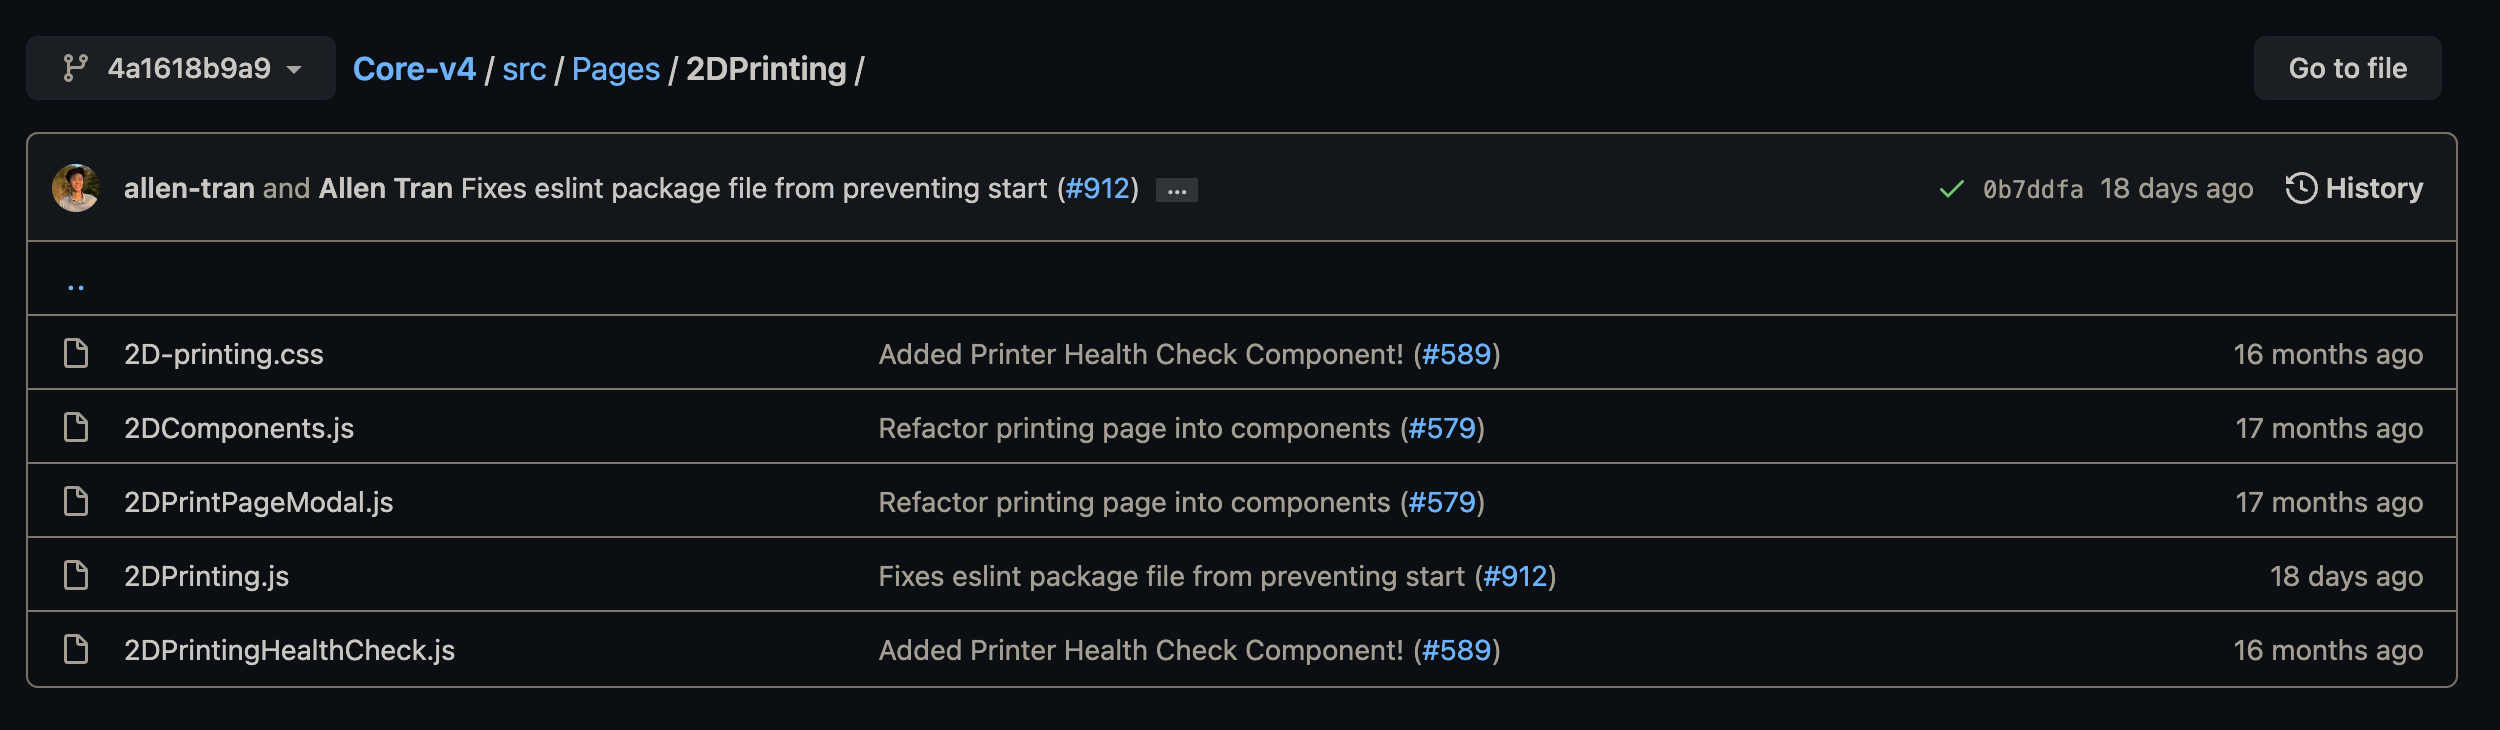
For example, to see the code for our Printing page check out src/Pages/2DPrinting. The layout of React/CSS files is below.
In the src/Pages folder, make a directory called Animals containing a single js file. The layout can be found below:
Animals/
└── Animals.js
Add the below to Animals.js, which simply renders a header to the user.
import React from 'react';

export default function AnimalPage() {
  return (
    <div className='m-10'>
      <h1 className="text-4xl font-extrabold leading-none tracking-tight text-gray-900 md:text-5xl lg:text-6xl dark:text-white">
        Welcome to the Animal Page!!
      </h1>
    </div>
  );
}All of Core-v4's routing is container in src/Routing.js. This file maps endpoints to the appropriate React components (e.g. localhost:3000/events to the event page).
To begin, let's import the React component to Routes.js.
import AnimalPage from './Pages/Animals/Animals';Note: while the function we defined in Animals.js was AnimalPage, you can import it as whatever you want in Routes.js. I decided to call it AnimalPage to be consistent.
To access the page without being signed in, add it to the signedOutRoutes array like below:
const signedOutRoutes = [
  // everything else...
  { Component: AnimalPage, path: '/animals'},
],
Now, going to http://localhost:3000/animals will yield the below result.

Since this tutorial is an extension from the backend, we should use our newly created component to show some data from the backend. To do this, we need to create a new file inside of src/APIFunctions. This will contain functions that React will call to interact with our newly created server.
Create a new file called Animals.js in the above directory. Let's create a function that will call on our API that will return all Animals in MongoDB (from the previous tutorial!).
import { ApiResponse } from './ApiResponses';

// if you are running the website with `sce run c`
// change the below string to:
// http://localhost:8080/api
const ANIMAL_API_URL = 'http://localhost:8084/animal_api';

export async function getAllAnimals() {
  let status = new ApiResponse();
  try {
    const res = await fetch(ANIMAL_API_URL + '/Animal/getAnimals')
    if (res.ok) {
      status.responseData = await res.json();
    } else {
      status.error = true;
    }
  } catch (err) {
    status.responseData = err;
    status.error = true;
  }
  return status;
}Let's add some data into MongoDB, you can use Postman for this, see this section from the previous tutorial.
Next, lets update the component to call on the APIFunction and list the data.
import React, { useState, useEffect } from 'react';
import { getAllAnimals } from '../../APIFunctions/Animals'

export default function AnimalPage() {
  const [animals, setAnimals] = useState([]);
  async function getAnimalsFromDB() {
    const animalsFromDB = await getAllAnimals();
    if (!animalsFromDB.error) {
      setAnimals(animalsFromDB.responseData);
    }
  }

  useEffect(() => {
    getAnimalsFromDB();
  }, []);

  return (
    <div className='m-10'>
      <h1 className="text-4xl font-extrabold leading-none tracking-tight text-gray-900 md:text-5xl lg:text-6xl dark:text-white">
        Welcome to the Animal Page!!
      </h1>


      <div className="relative overflow-x-auto mt-10">
        <table className="w-full text-sm text-left rtl:text-right text-gray-500 dark:text-gray-400">
          <thead className="text-xs text-gray-700 uppercase bg-gray-50 dark:bg-gray-700 dark:text-gray-400">
            <tr>
              <th scope="col" className="px-6 py-3">
                Animal name
              </th>
              <th scope="col" className="px-6 py-3">
                Description
              </th>
            </tr>
          </thead>
          <tbody>
            {animals.map((animal) => {
              return (
                <tr key={animal._id} className="bg-white border-b dark:bg-gray-800 dark:border-gray-700">
                  <th scope="row" className="px-6 py-4 font-medium text-gray-900 whitespace-nowrap dark:text-white">
                    {animal.name}
                  </th>
                  <td className="px-6 py-4">
                    {animal.description}
                  </td>
                </tr>
              );
            })}
          </tbody>
        </table>
      </div>

    </div>
  );
}
Now, refreshing the server should result with:

Let's create an admin page to manage the animals in the database. We must first create the admin component, AdminAnimals.js inside of src/Pages/Animals. For now, copy the same exact React code as our previous component, but change the title in the Header component to:
<h1 class="text-4xl font-extrabold leading-none tracking-tight text-gray-900 md:text-5xl lg:text-6xl dark:text-white">
  Welcome to the Animal Admin Page!!
</h1>Import and add the AdminAnimals component to the signedInRoutes array (src/Routing.js:43). Let's make the route animal-admin.
It should look something like:
// importing the component
import AnimalAdmin from './Pages/Animals/AnimalAdmin';

//...

// inside of signedInRoutes array
{
  Component: AnimalAdmin,
  path: '/animal-admin',
  allowedIf: userIsOfficerOrAdmin,
  redirect: '/',
  inAdminNavbar: true
},
You should create a user with admin access (see the creating an account section on the getting started wiki).
Now, going to http://localhost:3000/animal-admin when signed in as your Admin user, we should see:

if you want to add the "Animal Admin" entry to the sidebar as seen above, see the bottom of this tutorial
To add Animals from the Admin Component, let's add another function in APIFunctions.
export async function createAnimal(newAnimal, token) {
  let status = new ApiResponse();
  await axios.post(ANIMAL_API_URL + '/Animal/createAnimal',
    newAnimal,
    {
      headers: {
        Authorization: `Bearer ${token}`
      }
    }).catch(err => {
      status.error = true;
      status.responseData = err;
    });
  return status;
}Let's add some inputs and a button to add the Animal.
First, let's add some new hooks to keep track of the user's input:
  const [description, setDescription] = useState();
  const [name, setName] = useState();
  const [lifespan, setLifespan] = useState();
Finally, lets add some inputs so our react code will look like:
import React, { useEffect, useState } from 'react';
import { getAllAnimals, createAnimal } from '../../APIFunctions/Animals';
import { useSCE } from '../../Components/context/SceContext';

export default function AnimalPage() {
  const [animals, setAnimals] = useState([]);
  const [description, setDescription] = useState();
  const [name, setName] = useState();
  const [lifespan, setLifespan] = useState();
  const { user } = useSCE();

  async function getAnimalsFromDB() {
    const animalsFromDB = await getAllAnimals();
    if (!animalsFromDB.error) {
      setAnimals(animalsFromDB.responseData);
    }
  }

  useEffect(() => {
    getAnimalsFromDB();
  }, []);

  const INPUT_CLASS = 'indent-2 block w-full rounded-md border-0 py-1.5 text-gray-900 shadow-sm ring-1 ring-inset ring-gray-300 placeholder:text-gray-400 focus:ring-2 focus:ring-inset focus:ring-indigo-600 sm:text-sm sm:leading-6 text-white';
  return (
    <div className='m-10'>
      <h1 class="text-4xl font-extrabold leading-none tracking-tight text-gray-900 md:text-5xl lg:text-6xl dark:text-white">
        Welcome to the Animal Admin Page!!
      </h1>

      <div className="mt-10 grid grid-cols-1 gap-x-6 gap-y-8 grid-cols-full sm:grid-cols-6">
        <div className="col-span-full sm:col-span-4">
          <label htmlFor="name" className='block text-sm font-medium leading-6 text-gray-300'>
            Animal Name
          </label>
          <div className="mt-2">
            <input
              type="text"
              name="name"
              id="name"
              placeholder="For example, Dog"
              value={name}
              onChange={e => setName(e.target.value)}
              className={INPUT_CLASS}
            />
          </div>
        </div>
        <div className="col-span-full sm:col-span-4">
          <label htmlFor="description" className='block text-sm font-medium leading-6 text-gray-300'>
            Description
          </label>
          <div className="mt-2">
            <input
              type="text"
              name="description"
              id="description"
              value={description}
              onChange={e => setDescription(e.target.value)}
              className={INPUT_CLASS}
            />
          </div>
        </div>
        <div className="col-span-full sm:col-span-4">
          <label htmlFor="lifespan" className='block text-sm font-medium leading-6 text-gray-300'>
            Lifespan
          </label>
          <div className="mt-2">
            <input
              type="text"
              name="lifespan"
              id="lifespan"
              value={lifespan}
              onChange={e => setLifespan(e.target.value)}
              className={INPUT_CLASS}
            />
          </div>
        </div>
        <div className="col-span-full sm:col-span-4">
          <button
            type="submit"
            className="rounded-md bg-indigo-600 px-3 py-2 text-sm font-semibold text-white shadow-sm hover:bg-indigo-500 focus-visible:outline focus-visible:outline-2 focus-visible:outline-offset-2 focus-visible:outline-indigo-600"
            onClick={() => createAnimal({
              name,
              description,
              lifespan,
            }, user.token)}
          >
            Save
          </button>
        </div>
      </div>

    </div>
  );
}
The inputs should be

take the table from the /animals page code, and the admin dashboard should look like:

Up until now, everything has been spoon-fed to you. Can you figure out how to edit and delete components from the frontend?
Hint: Turn the data being displayed on the AnimalAdmin page into its own component. The edit and delete logic should be implemented there.
To have your webpage be accessible with a link in the navbar, see the below links.
Add it to unauthedRoutes in src/Components/Navbar/UserNavbar.js:9. When you go to the SCE website, the title with corresponding route should be visible in the navbar.
Add the below to the adminLinks array in src/Components/Navbar/AdminNavbar.js:42
{
  title: 'Animal Admin',
  route: '/animal-admin',
  icon: (
    <svg id='Mouse_Animal_24' width='24' height='24' viewBox='0 0 24 24' xmlns='http://www.w3.org/2000/svg'><rect width='24' height='24' stroke='none' fill='#000000' opacity='0' />
      <g transform="matrix(0.83 0 0 0.83 12 12)" >
        <path style={{
          stroke: "none",
          strokeWidth: 1,
          strokeDasharray: "none",
          strokeLinecap: "butt",
          strokeDashoffset: 0,
          strokeLinejoin: "miter",
          strokeMiterlimit: 4,
          fill: "white",
          fillRule: "nonzero",
          opacity: 1,
          }} transform=" translate(-12, -12.28)" d="M 17.5 2 C 15.625 2 13.748766 2.9525313 13.134766 5.0195312 C 13.039766 5.3645312 12.972656 5.7207031 12.972656 6.0957031 C 12.972656 6.5087031 13.034297 6.9156875 13.154297 7.3046875 L 11.244141 7.8964844 C 11.063141 7.3154844 10.974609 6.7087031 10.974609 6.0957031 C 10.974609 5.7227031 11.012172 5.3589062 11.076172 5.0039062 C 11.049172 5.0029063 11.027 5 11 5 C 7.2858296 5 3.336471 7.4356812 3.0292969 14.160156 C 2.5107459 14.31381 1.993634 14.573843 1.5 14.96875 C 0.69724125 15.610957 0 16.666667 0 18 C 0 19.5 1.1489888 20.85435 2.9335938 21.449219 C 4.7181987 22.044087 7.174104 21.996653 10.316406 20.949219 C 12.778062 20.128667 14.609186 19.931407 15.960938 20.214844 C 17.312689 20.498281 18.271328 21.209726 19.167969 22.554688 L 20.832031 21.445312 C 19.728672 19.790274 18.242092 18.650126 16.371094 18.257812 C 14.500095 17.865499 12.330938 18.168332 9.6835938 19.050781 C 6.8258962 20.003347 4.7818013 19.955913 3.5664062 19.550781 C 2.3510112 19.14565 2 18.5 2 18 C 2 17.333333 2.3027588 16.889043 2.75 16.53125 C 3.1972412 16.173457 3.8333333 16 4 16 L 24 16 L 24 14.763672 L 23.894531 14.552734 C 23.013531 12.790734 21.820969 10.882547 20.792969 9.5605469 C 21.562969 8.7385469 22 7.652 22 6.5 C 22 4.018 19.981 2 17.5 2 z M 16 10 C 16.552 10 17 10.448 17 11 C 17 11.552 16.552 12 16 12 C 15.448 12 15 11.552 15 11 C 15 10.448 15.448 10 16 10 z" stroke-linecap="round" />
      </g>
    </svg>
  ),
},- go to this website for cool icons
the sidebar will now have the below element:
