User Guide
Before starting you need to know you'll need an additional way to control your Android TV device other than the gamepad that will be mapped to touch events and will , if you have a TV remote that can send CEC commands to TV that's enough. If you don't have any other way to control it I'd recommend you use Vysor that will let you control the whole device from your computer, and also will come handy to create mapping config files.
- Before starting you should have ADB installed.
- Once you have adb installed you need to enable development tools in your Android TV box
- Download the latest version apk here and install in your Android TV device
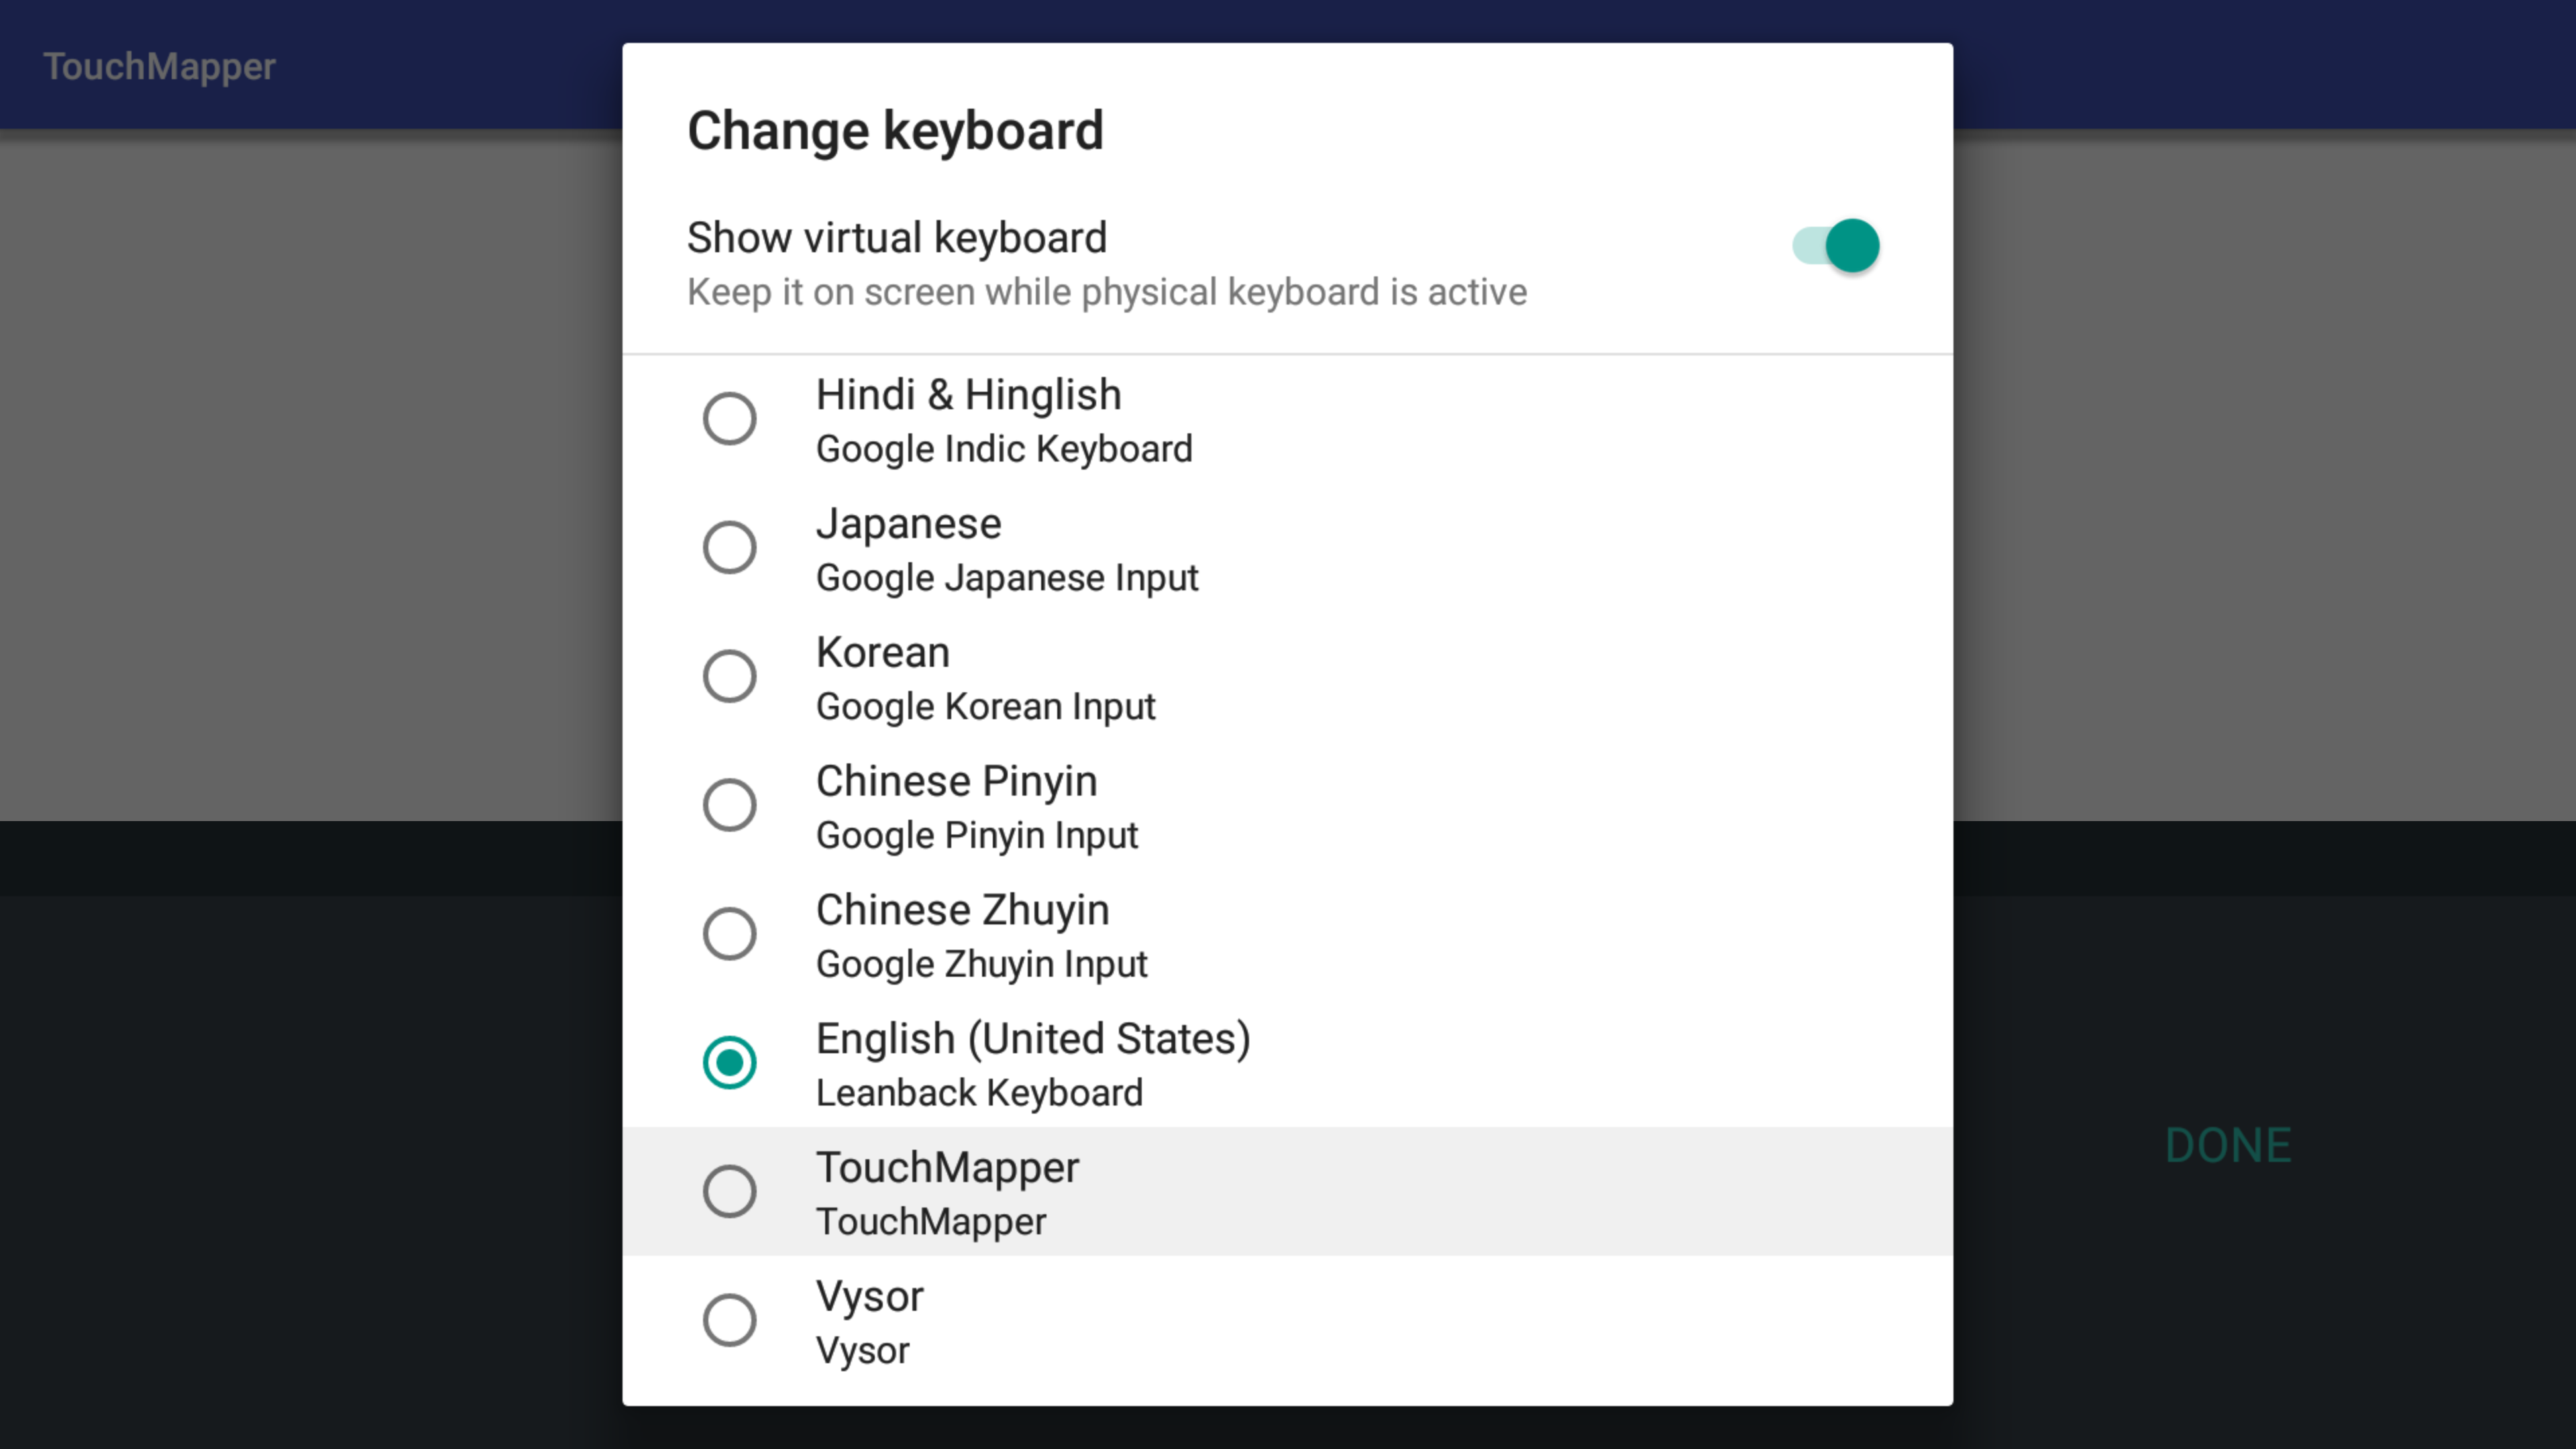
- After installing, in your AndroidTV device navigate to Settings->Keyboard->Manage Keyboards
- Search Touch Mapper and enable it.
- (Optionally you can enable 'Pointer location' inside Developer options, this will show in the screen where the pointer events are being simulated, it is not comfortable for playing games but you can use it to check it is working properly.)
- Now download Touch Mapper Launcher here
- And you are ready to go. Check the next section to know how to operate.
This guide assumes you are going to you use either one of the provided mapping files or you made your own. Here we'll use mapping for Into the Dead 2. If you don't have a mapping file you can use one of the provided files here or you can create your own as shown in this section
Once you have your json file ready in your computer, be sure your deviceId is properly placed in it. To do it you can open TouchMapper in your Android TV device, open Gamepad Test, click any button on the device you want to use and copy the deviceId shown into your json file
You want to write down the device's IP since you'll need it soon. You can do this by entering network settings, check the current Network connection and the IP will be shown.
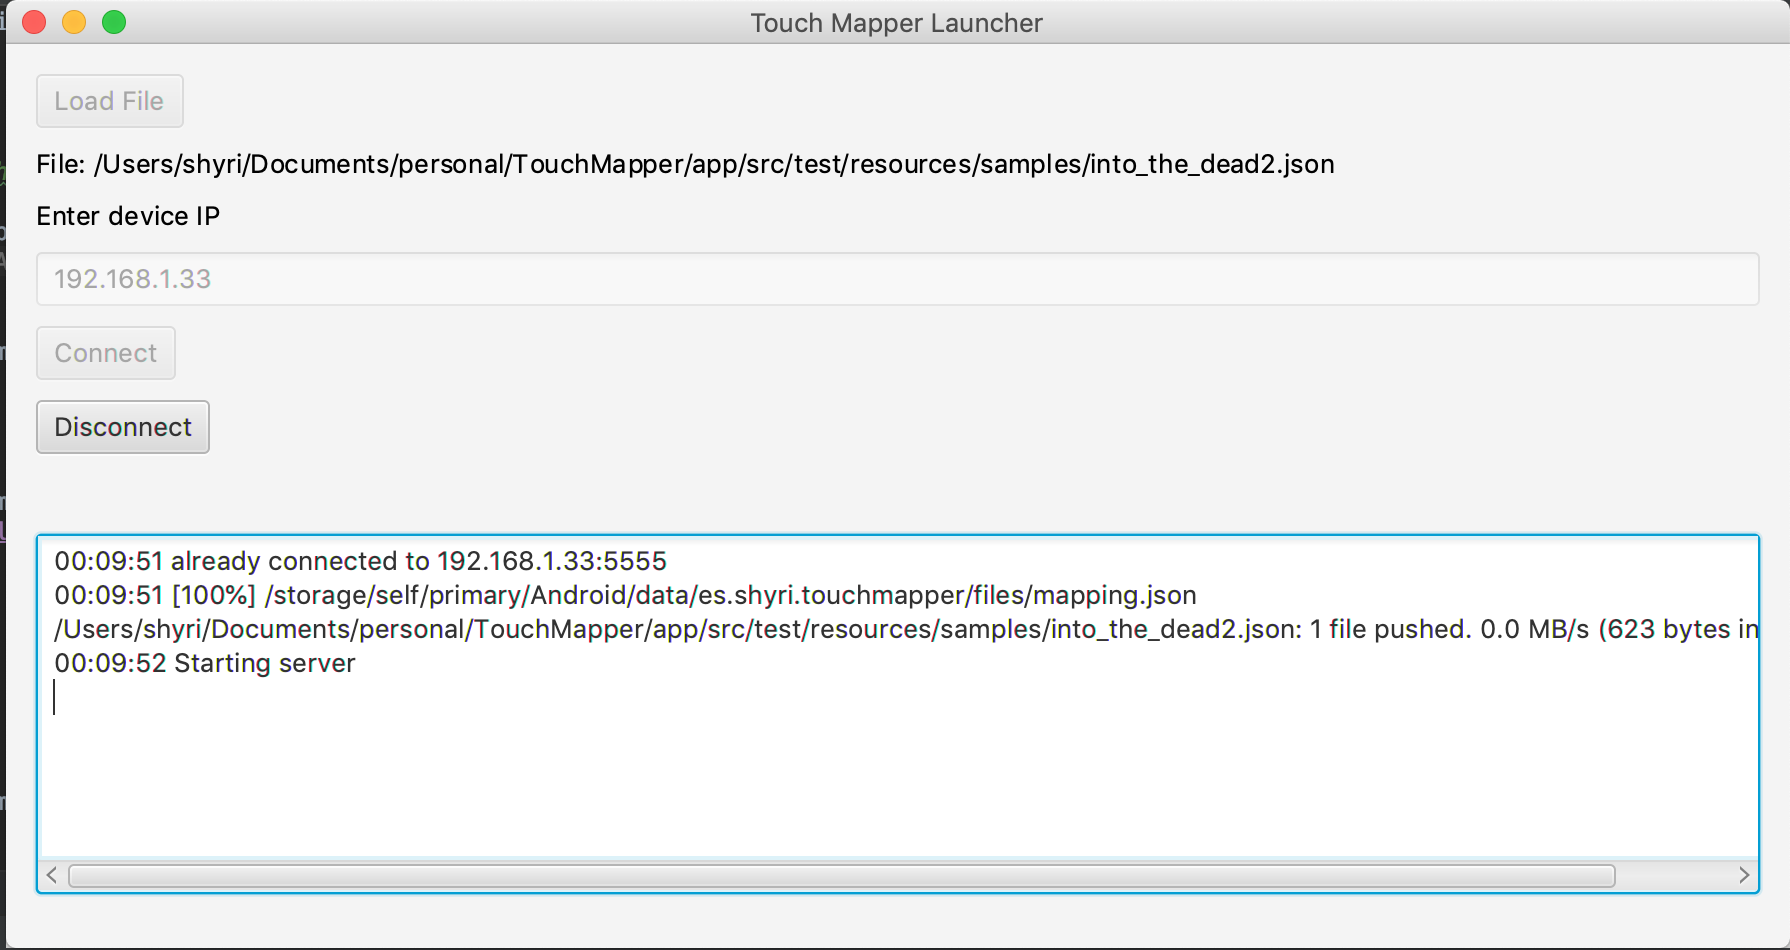
In your computer launch the Touch Mapper Launcher. Click Select ADB binary and find the adb binary you installed before, in mac you can usually find it in ./{user}/Library/Android/sdk/platform-tools/adb. Then select the mapping config json file, input the IP of the device and click connect.
After some few logs it'll be ready.
Now run Touch Mapper Android application, use the 'Select Input Method' button and select TouchMapper.
 From this point your Gamepad Input is captured by the Touch Mapper but it will not simulate touches yet, so from your perspective it will seem like the gamepad is not working, but don't worry. You may still be able use the back and home buttons in the gamepad to navigate in Android but you'll need other way to get to the game like tv remote or Vysor.
Whenever you are done playing you should close the Touch Mapper Launcher, and then in the Android TV device you should use your extra controller or Vysor to open Touch Mapper app again, use the 'Select Input Method' button and select 'Leanback keyboard' (or something similar). And your device is back to normal. Gamepad input will now work as usual.
In order to work, Touch Mapper needs a mapping config file. It will tell the app which gamepad input maps to what kind of touch events and where in the screen. You can find config files for several games here. If the game you want to play is not there you'll need to make your own config file. Follow these steps to make your own config file:
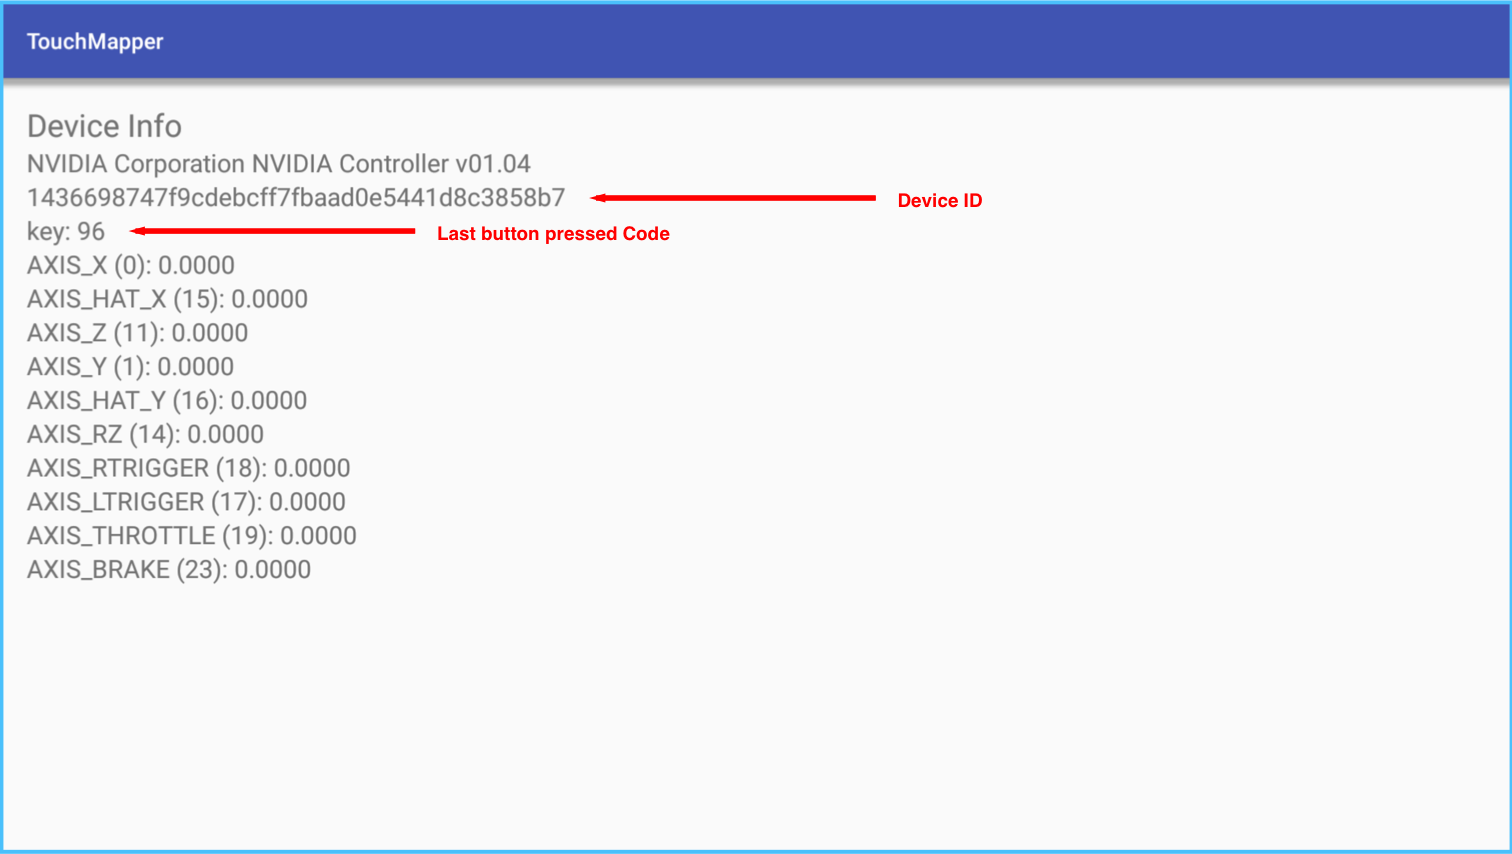
First you want to know which keyCode and axisCode correspond to your gamepad buttons and joysticks, at least those you want to know. You also want to know the deviceId of your gamepad. To know all that Touch Mapper has a special screen you can access opening the application and using the "Gamepad Test" button.
Open that screen and click any button on your gamepad. The deviceId will display here:
We will start making our mapping file with the device ID (replace with yours):
{
    "deviceId": "1436698747f9cdebcff7fbaad0e5441d8c3858b7"
}
Also you can check the keyCode for every button in your gamepad just by touching that button and seeing it here: And moving your joysticks you'll be able to tell which axis code correspond to which joystick axis.
This is the data I could collect from my gamepad but it doesn't necessarily mean it will be same in yours:
A Button : 96,
B Button: 4,
X Button: 99,
Y Button: 100,
L Button: 102,
R Button: 103
If we want to know where should we map the touch events we'll need to know the coordinates of the on-screen controls. For that you can enable two developer options called "Show Taps" and "Pointer Location".
Now it is time to open the game. In this guide I'll be mapping Galaxy on Fire 2
Connect your computer to your device using adb, for that open a terminal and type:
adb connect 192.168.1.33
But using you device's IP.
Open Vysor in your computer and make the game reach the screen you want to map, in my game:
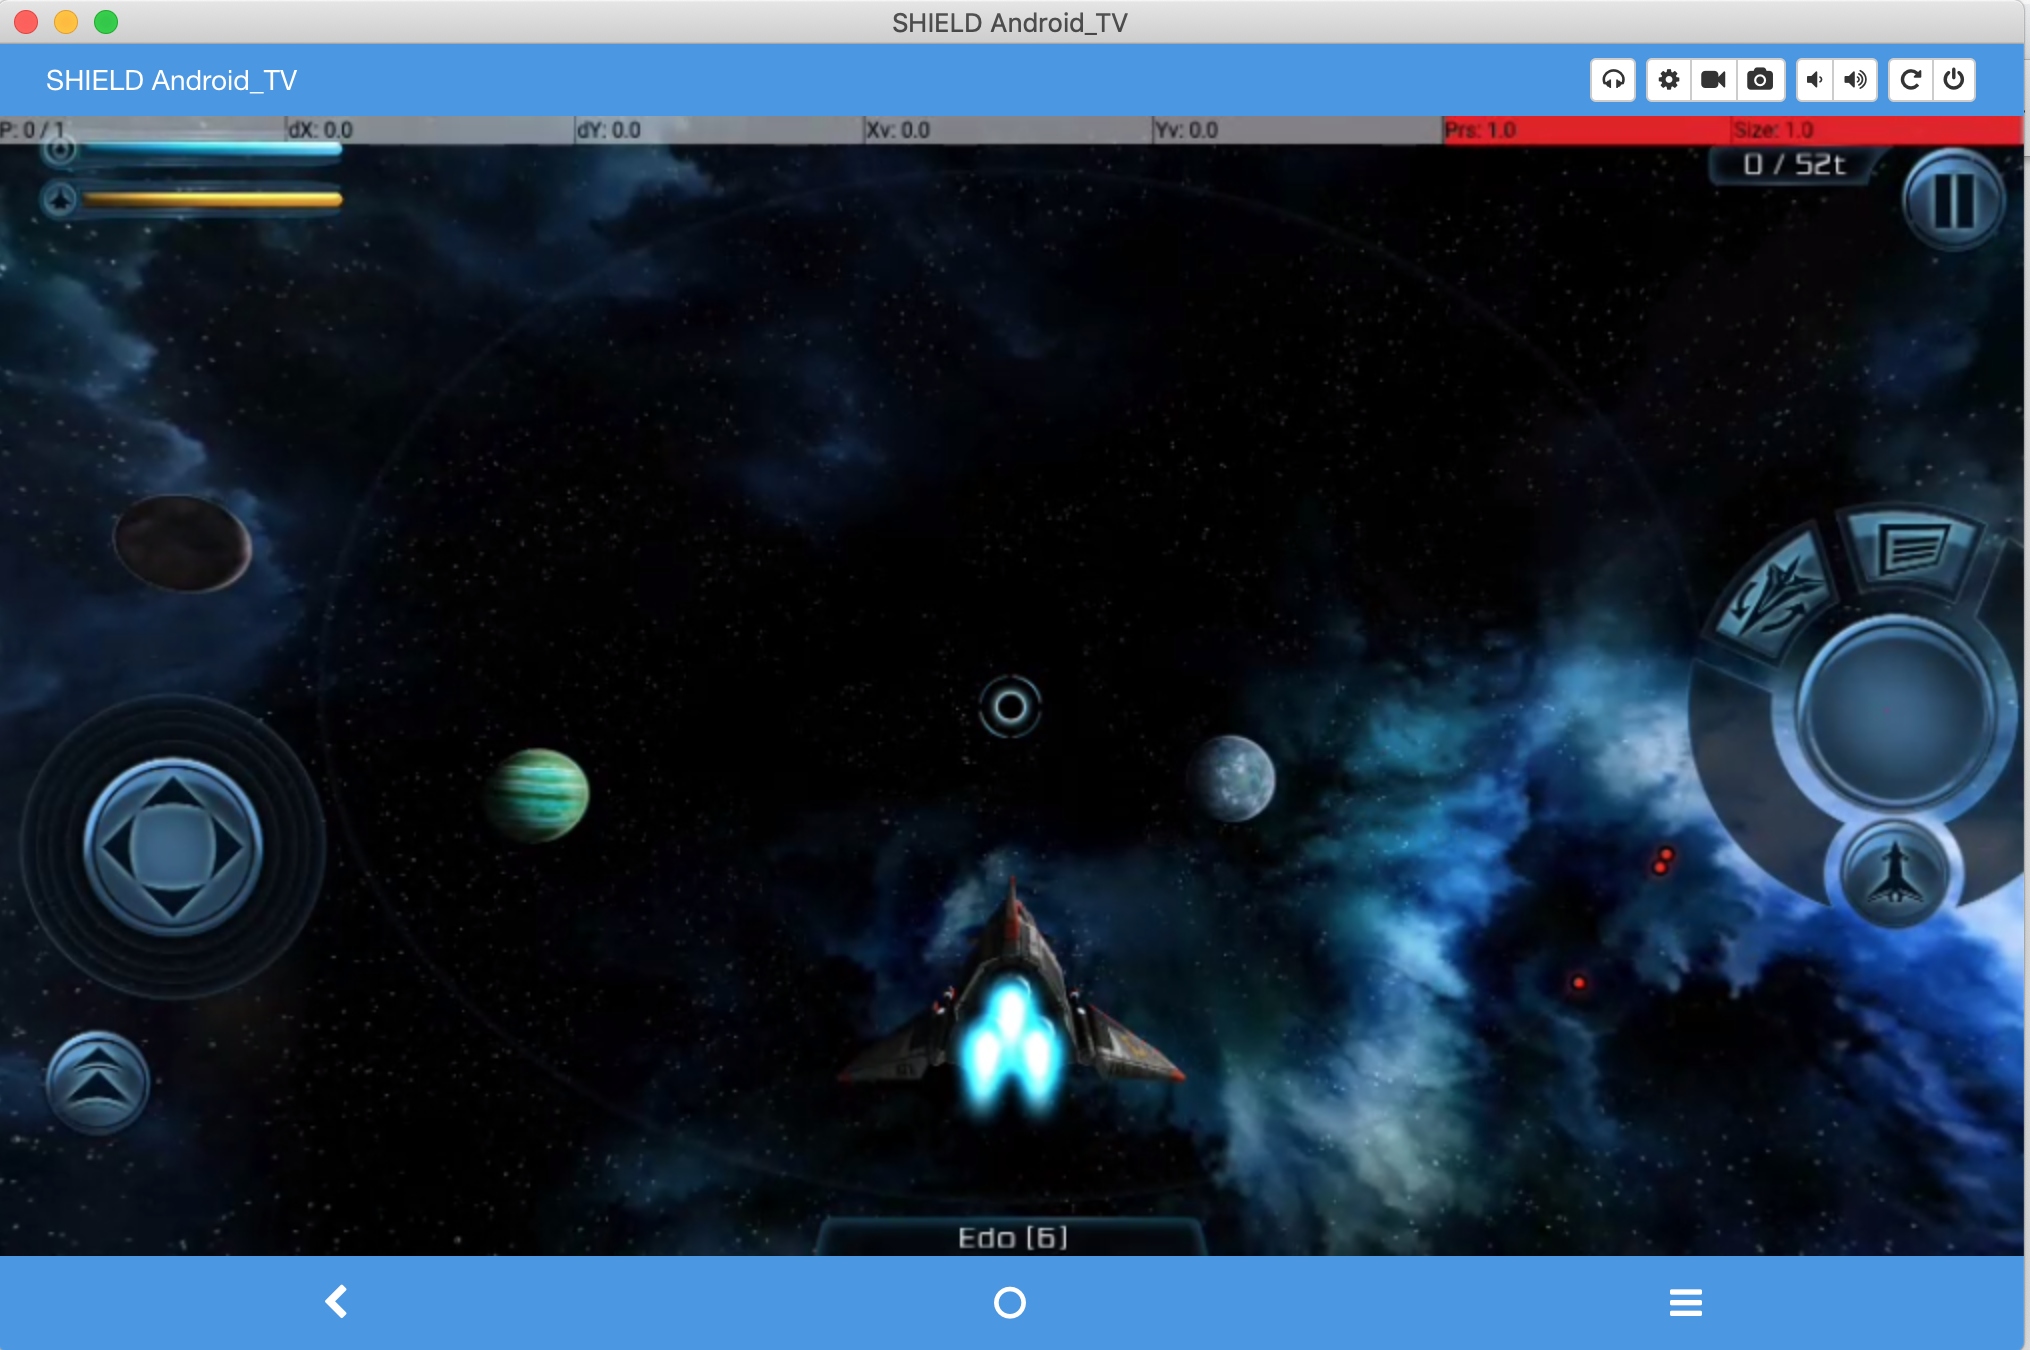
You can check now that for every click you make in Vysor you are going to see the coordinates in the top bar.
In this game, the basic actions are move and shoot.
Shooting action is performed by clicking on a circle button on the bottom right side in the screen.
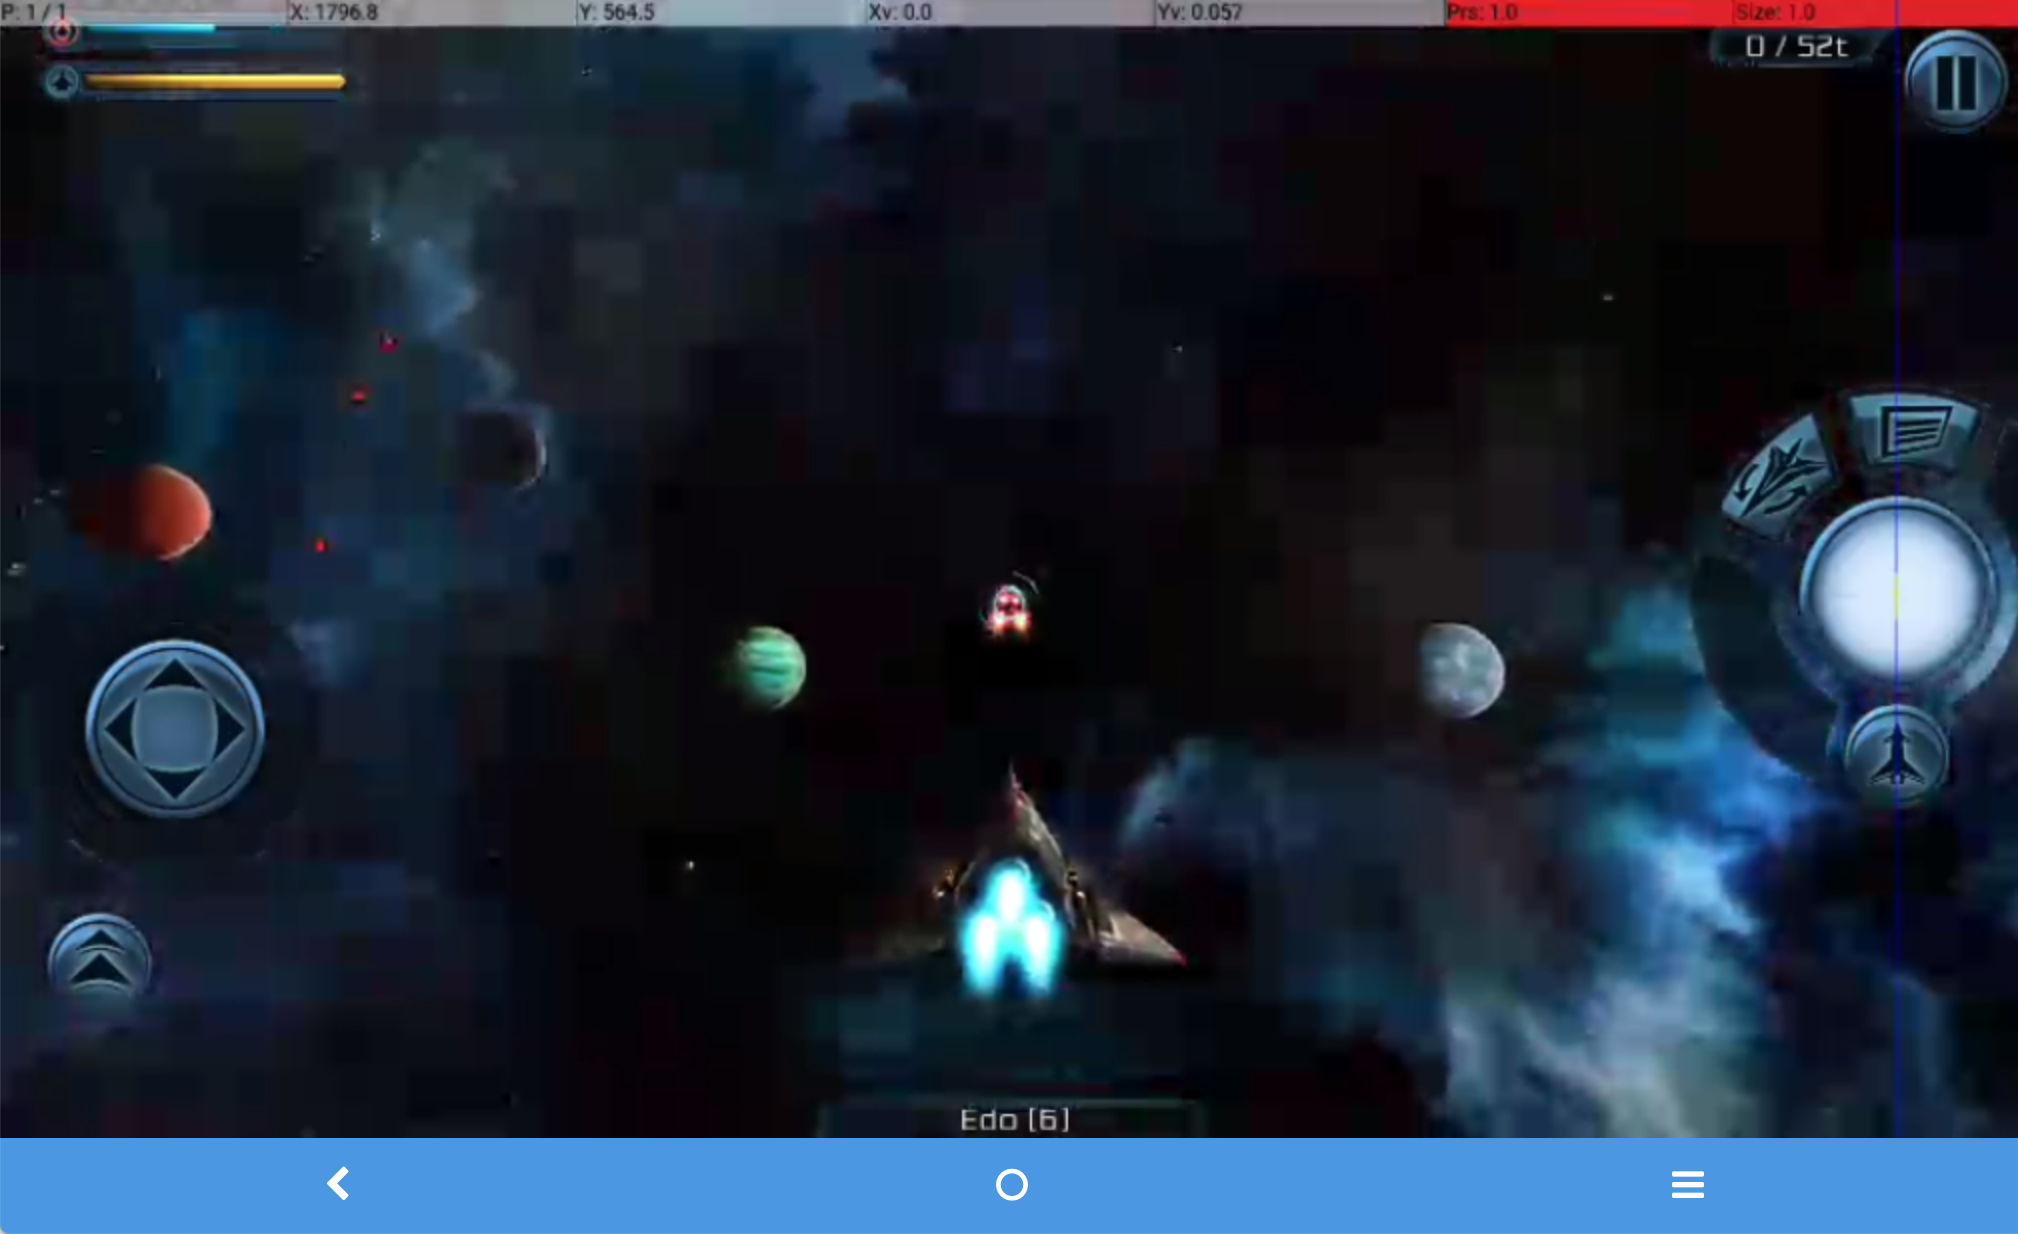 Usin Vysor to click on that button will show the click coordinates, I will round them to x: 1800, y: 550.
I'll add this button as a Tap Mapping. This represents a normal tap (touch and lift the finger) in a particular place in the screen (x and y coordinates). We add it like this:
Usin Vysor to click on that button will show the click coordinates, I will round them to x: 1800, y: 550.
I'll add this button as a Tap Mapping. This represents a normal tap (touch and lift the finger) in a particular place in the screen (x and y coordinates). We add it like this:
{
    "deviceId": "1436698747f9cdebcff7fbaad0e5441d8c3858b7"
    "mappings": [
       {
         "type": "TAP",
         "keyCode": 96,
         "x": 1800,
         "y": 550,
         "action": "shoot"
       }
    ]
}
As you can see, for every mapping we must set a type (TAP in this case). For a TAP map we need to put a keyCode, the one for the button you want to map and you can know as we saw before, and coordinates x and y. I also added an action field but this is just for me to remember what it does, this field will be ignored by the mapper.
Mapping the joystick: The movement is done by a virtual joystick. For this we'll use the mapping called "circle". This one basically allows to map a joystick to a circular virtual joystick that has given x and y coordinates for the center and a radius.
The following screenshots shows where the center is and how I calculate the radius moving the virtual joystick all the way to the right using vysor
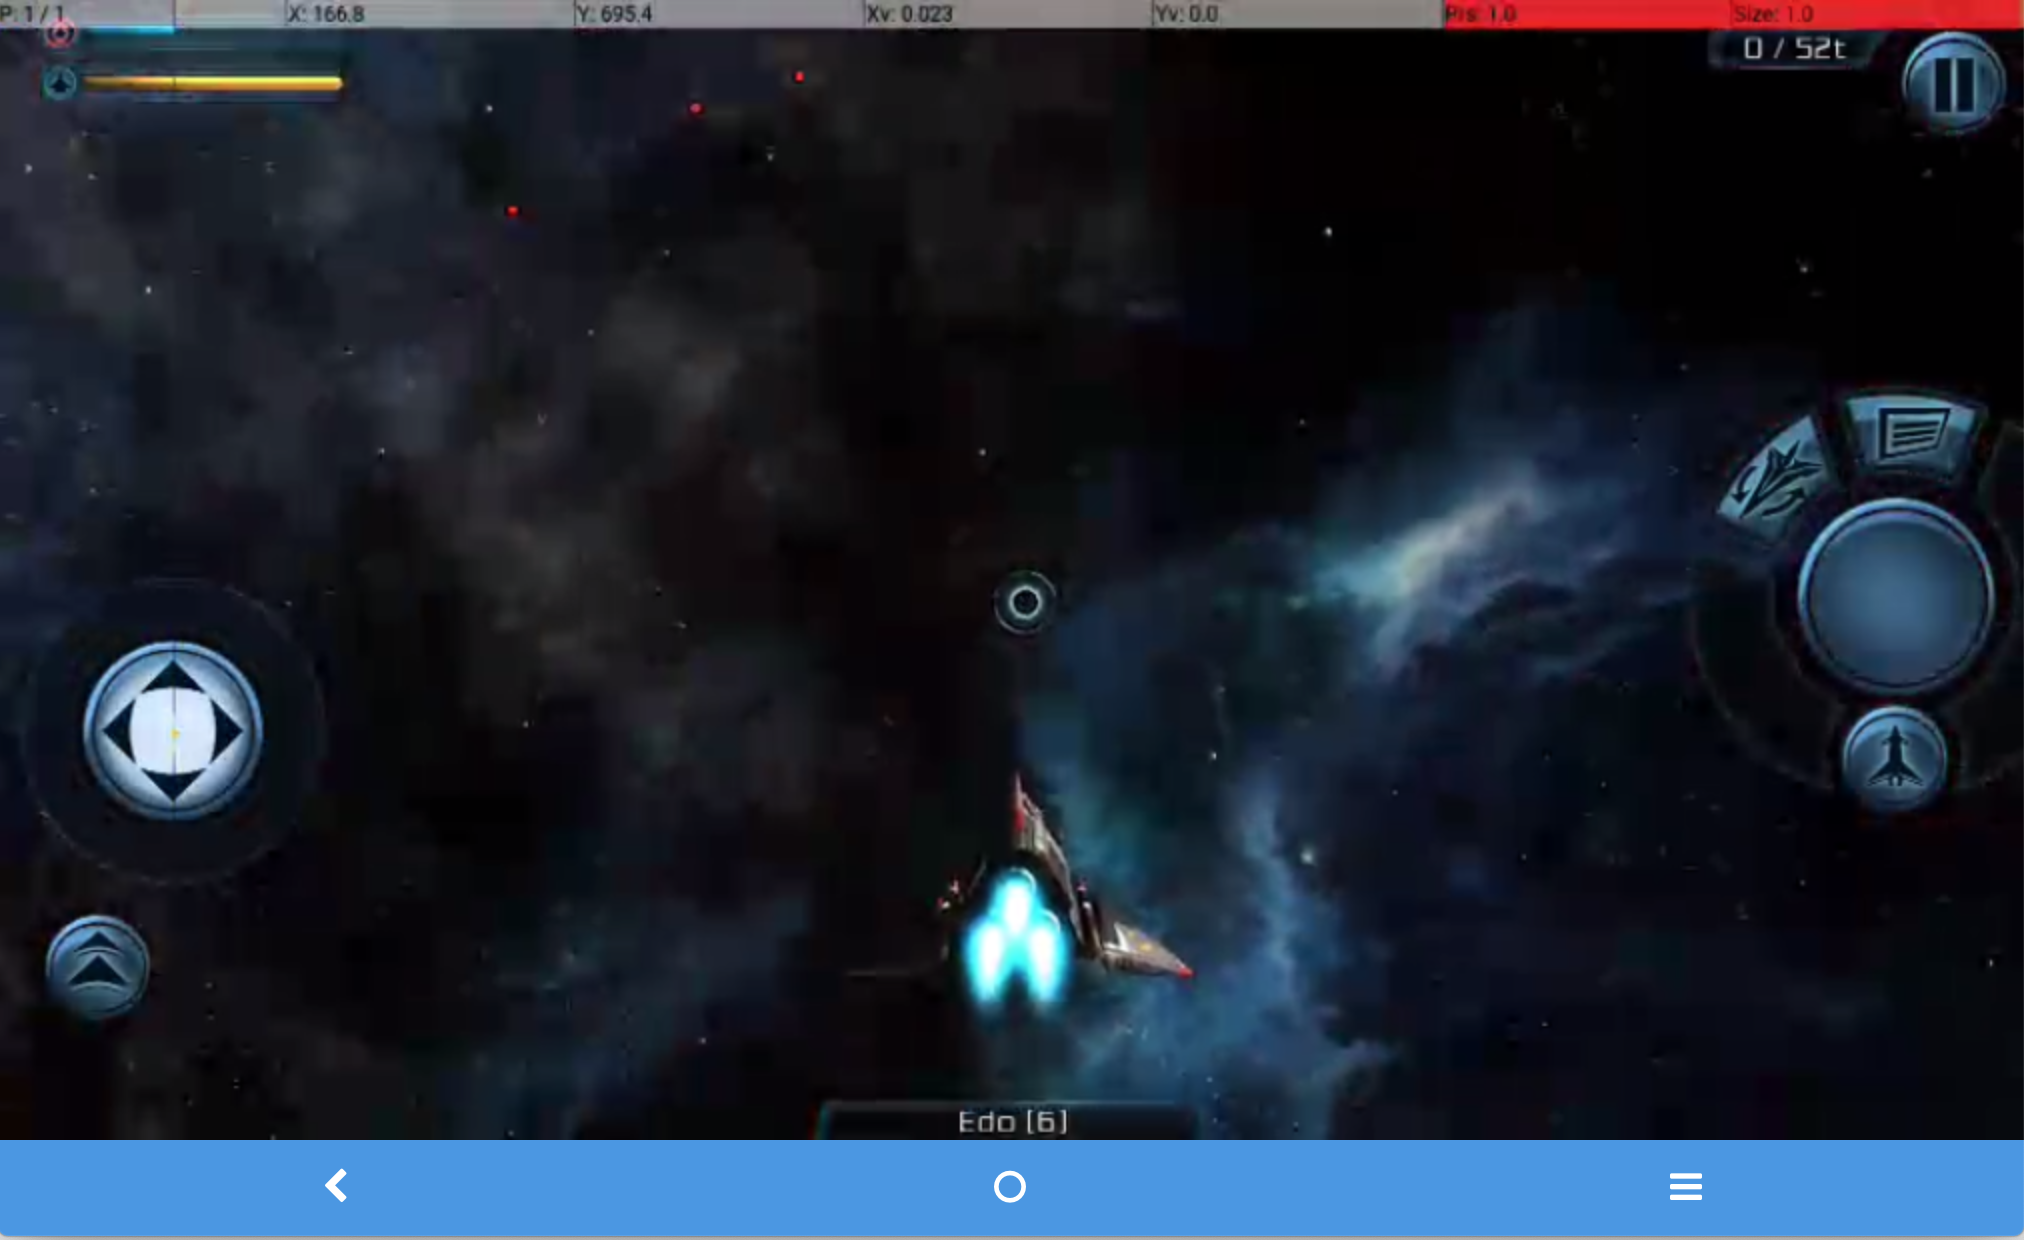
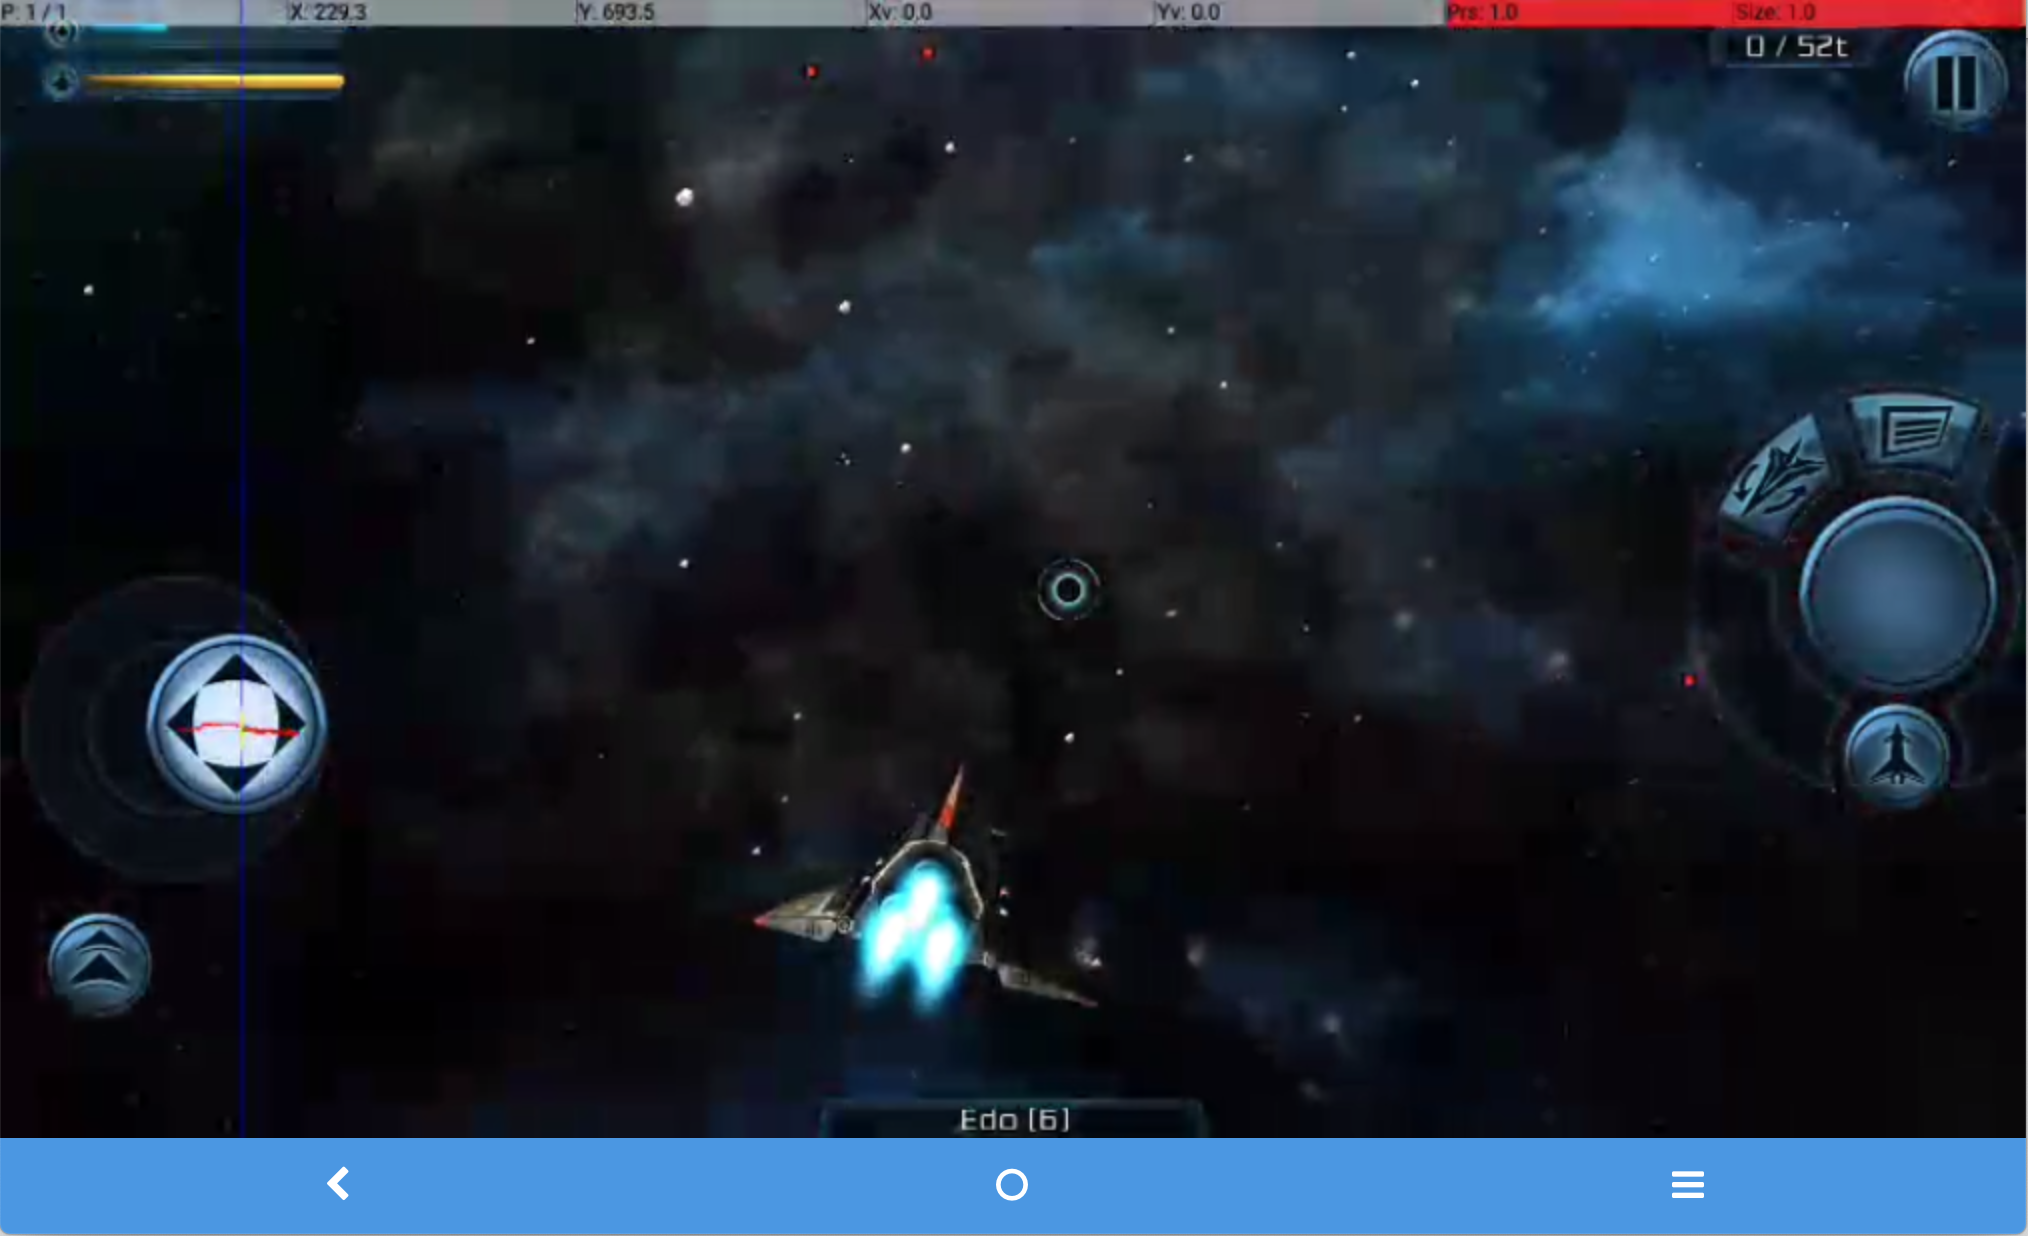
This gives us center x: 160, x: 700 and a radious of (230 - 160) = 70. And we add it to the file like this:
{
    "deviceId": "1436698747f9cdebcff7fbaad0e5441d8c3858b7"
    "mappings": [
       {
         "type": "TAP",
         "keyCode": 96,
         "x": 1800,
         "y": 550,
         "action": "shoot"
       },
       {
         "type": "CIRCLE",
         "radius": 70,
         "x": 160,
         "y": 700,
         "axis_x": 0,
         "axis_y": 1,
         "action": "move"
       }
    ]
}
You can know which are the axis to asign also with the 'Gamepad Test' inside the app just play with the joysticks to know which corresponds to what axis Id.
These are the two basic controls, there are more in the screen but most of them will be tap mappings to a particular button.
Once you have finished making the file you can use it as explain in the first section