Deploying Code
Once you have some code written, you can deploy it onto the robot for testing and running.
- Robot: 10.2.54.2
- Router: 10.2.54.4
- Driver station: 10.2.54.5
- Your computer: 10.2.54.X, where 0 <= X <= 255 and X != 2, 4, or 5
- Subnet mask: 255.255.255.0
- Default gateway: no need to change
- DNS settings: no need to change
In order to deploy code, you must first adjust your computer's network settings to use a specific static IP address.
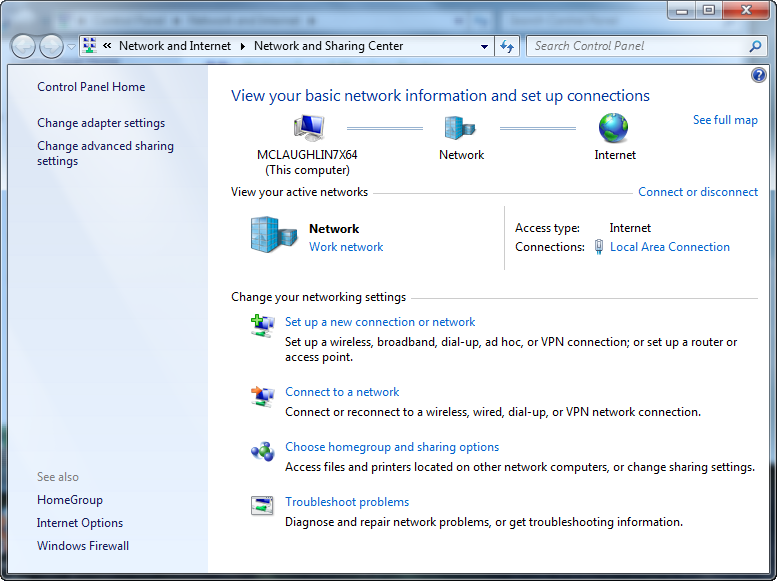
Go to Start » Control Panel » Network and Internet » Network and Sharing Center. You should see the below screen.
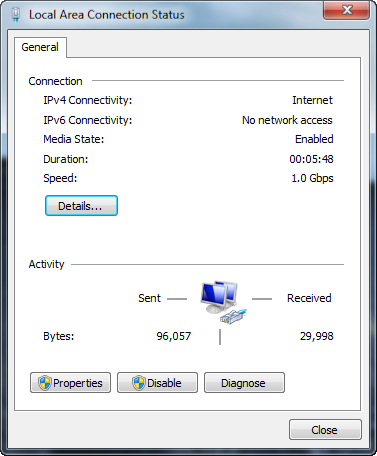
Click Local Area Connection. You should see the below window appear:
Click Properties. The following window should appear:
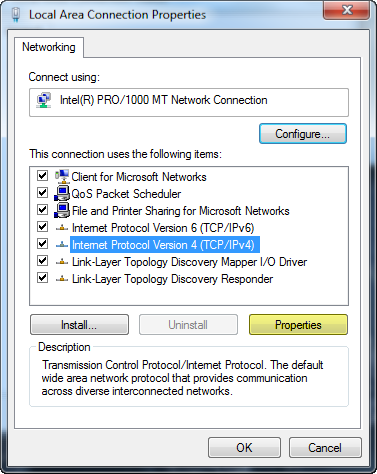
Click to highlight Internet Protocol Version 4 (IPv4), then click Properties.

Click the Use the following IP address radio button, and enter the following:
- IP address: 10.2.54.6
- Subnet mask: 255.255.255.0
- Default gateway: no need to change
- DNS settings: no need to change
That's all you need. Click OK and Close to close all the windows.
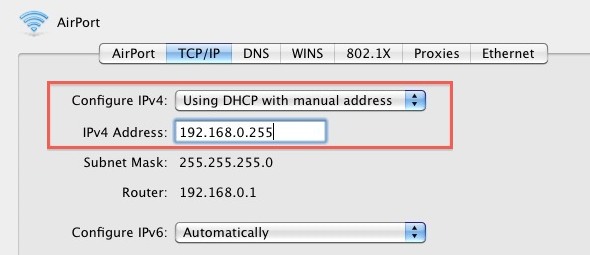
Go to System Preferences » Network » Built-in Ethernet » TCP/IP » Using DHCP with manual address. For the IPv4 address, enter 10.2.54.6
These instructions will vary depending on what version of the operating system you're running. I haven't even tested these steps myself!
Fire up NetBeans, and make sure you have the FRC-2013 project open. From here, there are two ways to deploy code to the robot.
- Click the green "play" triangle near the top of the window.
- Right-click the FRC-2013 project in the left project manager panel, and click Run.
Then, we wait. Deploying code to the robot takes a bit of time (roughly under a minute). Drive safely!