The forecast assistant is a customizable application template for building AI-powered forecasts. In addition to creating a hosted and shareable user interface, the forecast assistant provides:
- Best-in-class predictive model training and deployment using DataRobot forecasting.
- An intelligent explanation of factors driving the forecast that are uniquely derived for any series at any time.
Warning
Application templates are intended to be starting points that provide guidance on how to develop, serve, and maintain AI applications. They require a developer or data scientist to adapt and modify them to meet business requirements before being put into production.
- Setup
- Architecture overview
- Why build AI Apps with DataRobot app templates?
- Make changes
- Share results
- Delete all resources
- Setup for advanced users
- Data privacy
Important
If you are running this template in a DataRobot codespace, pulumi is already configured and the repository is automatically cloned.
Skip to Step 3.
-
If
pulumiis not already installed, install the CLI following instructions here. After installingpulumifor the first time, restart your terminal and run:pulumi login --local # omit --local to use Pulumi Cloud (requires separate account) -
Clone the template repository.
git clone https://github.com/datarobot-community/forecast-assistant.git cd forecast-assistant -
Rename the file
.env.templateto.envin the root directory of the repo and populate your credentials.[Optional] If you want to use the GenAI functionality of the app, follow the instructions in
.envto supply LLM credentials. -
In a terminal, run the following command:
python quickstart.py YOUR_PROJECT_NAME # Windows users may have to use `py` instead of `python`Python 3.9+ is required.
Advanced users who want to control virtual environment creation, dependency installation, environment variable setup,
and pulumi invocation, see the advanced setup instructions.

App Templates contain three families of complementary logic. For this template, you can opt-in to fully custom AI logic and a fully custom front-end or utilize DataRobot's off-the-shelf offerings:
- AI logic: Necessary to service AI requests, generate predictions, and manage predictive models.
notebooks/ # Model training logic, scoring data prep logic - App logic: Necessary for user consumption, whether via a hosted front-end or integrating into an external consumption layer.
frontend/ # Streamlit frontend forecastic/ # App biz logic & runtime helpers - Operational logic: Necessary to turn on all DataRobot assets.
infra/  # Settings for resources and assets to be created in DataRobot
infra/__main__.py  # Pulumi program for configuring DataRobot to serve and monitor AI and App logic
App templates transform your AI projects from notebooks to production-ready applications. Too often, getting models into production means rewriting code, juggling credentials, and coordinating with multiple tools and teams just to make simple changes. DataRobot's composable AI apps framework eliminates these bottlenecks, letting you spend more time experimenting with your ML and app logic and less time wrestling with plumbing and deployment.
- Start building in minutes: Deploy complete AI applications instantly, then customize AI logic or front-end independently - no architectural rewrites needed.
- Keep working your way: Data scientists keep working in notebooks, developers in IDEs, and configs stay isolated - update any piece without breaking others.
- Iterate with confidence: Make changes locally and deploy with confidence - spend less time writing and troubleshooting plumbing, more time improving your app.
Each template provides an end-to-end AI architecture, from raw inputs to deployed application, while remaining highly customizable for specific business requirements.
-
Edit the following two notebooks:
notebooks/train_model.ipynb: Handles training data ingest and preparation and model training settings.notebooks/prep_scoring_data.ipynb: Handles scoring data preparation (the data used to show forecasts in the front-end).
The last cell of each notebook is required, as it writes outputs needed for the rest of the pipeline.
Recent improvements in train_model.ipynb:
- Dual-mode operation: The notebook now supports both training new models and using existing deployments
- Automatic metadata extraction: When using an existing deployment, the notebook automatically extracts model metadata (target, datetime partition column, etc.)
- Flexible feature configuration: Easy configuration of known-in-advance features for what-if analysis
- Error handling: Improved error handling with fallback mechanisms for missing model metadata
- Run the revised notebooks.
- Run
pulumi upto update your stack with these changes.
source set_env.sh  # On windows use `set_env.bat`
pulumi up- For a forecasting app that is continuously updated, consider running
prep_scoring_data.ipynbon a schedule.
In infra/settings_generative.py: Set LLM=None to disable any generative output altogether.
To use an existing forecast deployment instead of creating a new one:
- In
.env: SetFORECAST_DEPLOYMENT_IDto the ID of your existing deployment - Run
pulumi upto update your stack with the existing deploymentsource set_env.sh # On windows use `set_env.bat` pulumi up
⚠️ Note: When using an existing deployment:
- The script will skip creating batch prediction jobs and retraining policies
- The
train_model.ipynbnotebook will skip training and extract metadata from the existing model- You may need to adjust the
feature_settings_configin the notebook to match your model's known-in-advance features
Files that need modification for existing deployments:
When using an existing deployment, you may need to modify these files to match your model's configuration:
-
notebooks/train_model.ipynb- Update thefeature_settings_configto match your model's known-in-advance features:feature_settings_config=[ FeatureSettingConfig(feature_name="Your_Feature_Name", known_in_advance=True), # Add other known-in-advance features from your model ]
-
notebooks/prep_scoring_data.ipynb- Ensure your scoring data preparation matches the data format expected by your existing model -
forecastic/schema.py- Update app settings if your model has different features or requirements
What happens when using an existing deployment:
- Model Training: Completely skipped - no new model is trained
- Data Ingestion: Skipped - uses existing model's training data
- Metadata Extraction: The notebook extracts target, datetime partition column, and other model metadata from your existing deployment
- Resource Creation: Only creates the application frontend and LLM components (if enabled)
- Batch Prediction: Not created (you'll need to set up your own if needed)
- Retraining Policy: Not created (you'll need to set up your own if needed)
- Modify the
LLMsetting ininfra/settings_generative.pyby changingLLM=LLMs.AZURE_OPENAI_GPT_4_O_MINIto any other LLM from theLLMsobject.- Trial users: Please set
LLM=LLMs.AZURE_OPENAI_GPT_4_O_MINIsince GPT-4o is not supported in the trial. Use theOPENAI_API_DEPLOYMENT_IDin.envto override which model is used in your azure organisation. You'll still see GPT 4o-mini in the playground, but the deployed app will use the provided azure deployment.
- Trial users: Please set
- To use an existing TextGen model or deployment:
- In
infra/settings_generative.py: SetLLM=LLMs.DEPLOYED_LLM. - In
.env: Set either theTEXTGEN_REGISTERED_MODEL_IDor theTEXTGEN_DEPLOYMENT_ID - In
.env: SetCHAT_MODEL_NAMEto the model name expected by the deployment (e.g. "claude-3-7-sonnet-20250219" for an anthropic deployment, "datarobot-deployed-llm" for NIM models )
- In
- In
.env: If not using an existing TextGen model or deployment, provide the required credentials dependent on your choice. - Run
pulumi upto update your stack (Or rerun your quickstart).source set_env.sh # On windows use `set_env.bat` pulumi up
⚠️ Availability information:
Using a NIM model requires custom model GPU inference, a premium feature. You will experience errors by using this type of model without the feature enabled. Contact your DataRobot representative or administrator for information on enabling this feature.
- Ensure you have already run
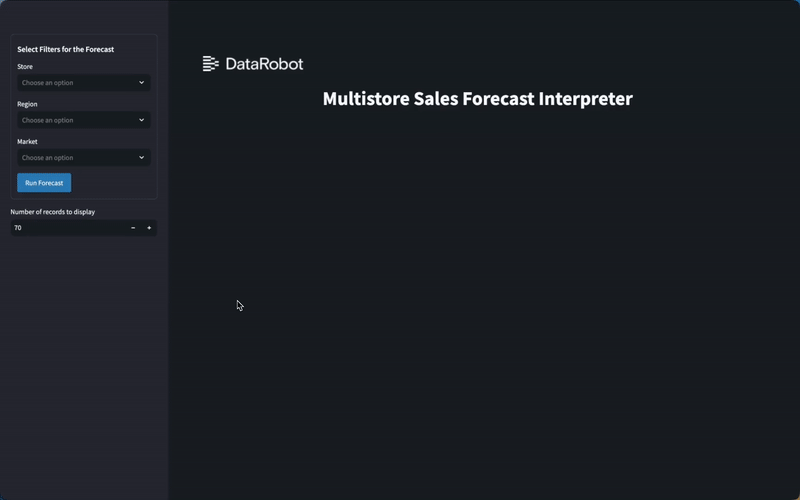
pulumi upat least once (to provision the time series deployment). - Streamlit assets are in
frontend/and can be edited. After provisioning the stack at least once, you can also test the front-end locally usingstreamlit run app.pyfrom thefrontend/directory (don't forget to initialize your environment usingsource set_env.sh).
source set_env.sh # On windows use `set_env.bat`
cd frontend
streamlit run app.py- Run
pulumi upagain to update your stack with the changes.
source set_env.sh  # On windows use `set_env.bat`
pulumi upOptionally, you can set the application locale in forecastic/i18n.py, e.g. APP_LOCALE = LanguageCode.JA. Supported locales are Japanese and English, with English set as the default.
The application now supports inheriting resource configurations from the Application Source. When the Application Source is created, the system automatically fetches its resource settings (replicas, memory, CPU) via the DataRobot API and applies them to the Custom Application.
How it works:
- The Application Source is created with its resource configuration
- The system fetches the source's resource details using
application_source.id - These resources are automatically applied to the Custom Application
Environment variables required:
DATAROBOT_ENDPOINT: Your DataRobot API endpointDATAROBOT_API_TOKEN: Your DataRobot API token
Fallback behavior:
- If resources cannot be fetched from the Application Source, the system falls back to DataRobot's automatic resource allocation
- Error messages are logged as warnings, ensuring deployment continues successfully
The following environment variables can be configured in your .env file:
Required for all deployments:
DATAROBOT_ENDPOINT: Your DataRobot API endpoint (e.g.,https://app.datarobot.com)DATAROBOT_API_TOKEN: Your DataRobot API token
Optional for existing deployments:
FORECAST_DEPLOYMENT_ID: ID of an existing forecast deployment to reuse instead of creating a new oneTEXTGEN_REGISTERED_MODEL_ID: ID of an existing registered model for LLM functionalityTEXTGEN_DEPLOYMENT_ID: ID of an existing LLM deployment for LLM functionalityCHAT_MODEL_NAME: Model name for LLM deployments (e.g., "claude-3-7-sonnet-20250219", "datarobot-deployed-llm")
Optional for LLM providers:
OPENAI_API_KEY: OpenAI API key (for OpenAI LLMs)OPENAI_API_DEPLOYMENT_ID: Azure OpenAI deployment ID (for Azure OpenAI)ANTHROPIC_API_KEY: Anthropic API key (for Claude models)GOOGLE_API_KEY: Google API key (for Google LLMs)
Optional for advanced configuration:
DATAROBOT_DEFAULT_USE_CASE: Use case ID to associate with the project
- Log into the DataRobot application.
- Navigate to Registry > Applications.
- Navigate to the application you want to share, open the actions menu, and select Share from the dropdown.
pulumi downThen run the jupyter notebook notebooks/delete_non_pulumi_assets.ipynb.
For manual control over the setup process, adapt the following steps for MacOS/Linux to your environent:
python -m venv .venv
source .venv/bin/activate
pip install -r requirements.txt
source set_env.sh
pulumi stack init YOUR_PROJECT_NAME
pulumi up
e.g., for Windows/conda/cmd.exe the previous example would change to the following:
conda create --prefix .venv pip
conda activate .\.venv
pip install -r requirements.txt
set_env.bat
pulumi stack init YOUR_PROJECT_NAME
pulumi up
For projects that will be maintained, DataRobot recommends forking the repo so upstream fixes and improvements can be merged in the future.
Your data privacy is important to DataRobot. Data handling is governed by the DataRobot Privacy Policy. Review the policy before using your own data with DataRobot.