
Your filament wants to be free

Checkout the official documentation on https://openspool.io 👈

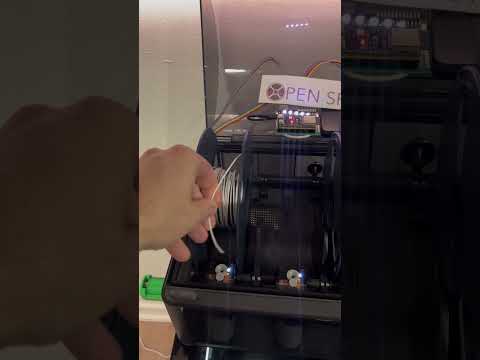
Adhere NFC stickers on all your filament. Build an ESP32 OpenSpool reader and place it next to your printer. Touching the filament to the reader will automatically update your Bambu Printer filament settings. Almost as seamlessly as if you were using Bambu filament with an AMS.
| Protocol | Read | Write | Type |
|---|---|---|---|
| OpenSpool | ✅ | ✅ | NTAG 215/216 |
| TigerTag | 🚧 In progress | 🚧 In progress | NTAG 213 |
| Bambu | 🚧 In progress | ❌ | MiFare Classic 1k |
| OpenTag3D | 🚧 In progress | 🚧 In progress | NTAG 213/215/216 |
| Creality | 🗓️ Planned | 🗓️ Planned | MiFare Classic 1k |
| PrusaRFID | ❓ | ❓ | ❓ |
Many 3d printer filament companies are uniting around an open standard called OpenTag3D. It planned to be finalized in early-mid 2025. OpenSpool will support OpenTag formatted tags as soon as it is finalized. See here for more information.
OpenSpool aims to use the simplest possible protocol for RFID tags. All you need is a NTAG215/216
Example record stored on NFC tag.
type = `application/json`
payload =
{
    "protocol": "openspool",
    "version": "1.0",
    "type": "PLA",
    "color_hex": "FFAABB",
    "brand": "Generic",
    "min_temp": "220",
    "max_temp": "240"
}

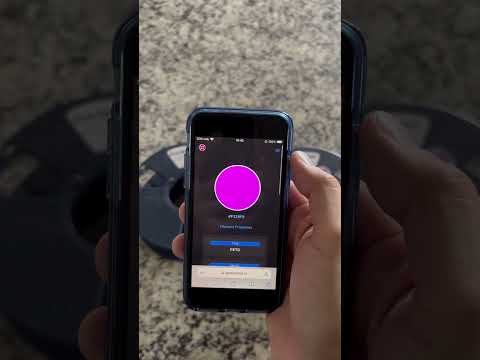
Spool information can be seen using your phone.

https://openspool.io/tag_info?color_hex=FFAABB&type=PLA&brand=Generic&min_temp=220&max_temp=240&protocol=openspool&version=1.0
Currently, OpenSpool works with Bambu printers over MQTT. Other integrations are planned. Pull Requests welcome
| Integration | Supported |
|---|---|
| Bambu | ✅ |
| OctoPrint | 🚧 In Progress |
| Prusa Connect | 🗓️ Planned |
| SpoolMan | 🗓️ Planned |
| Klipper / Moonraker | 🗓️ Planned |
| Anker | ❔ |
Bambu
Bambu X1C printers running 1.08.05.00 or newer must enable LAN Mode and Developer Mode for the OpenSpool reader to work. Additional information on bambu's blog.
All other Bambu Printers and X1C printers running firmware older than 1.08.05.xx do not need to enable Developer Mode.
The OpenSpool schematics will always be free. If you don't want to source the parts yourself, you can buy a kit on tindie.com.


| Image | Hardware | Link 1 | Link 2 |
|---|---|---|---|
 |
OpenSpool Mini PCB v3.1 * | Gerber Files | |
 |
OpenSpool Mini Enclosure (3D Printed) | MakerWorld | |
 |
Wemos D1 Mini s3 | AliExpress | |
 |
PN532 (Small) | Amazon | AliExpress |
 |
NTAG 215/216 (13.56Mhz NFC Tags >500 bytes) | Amazon | |
 |
WS2812B LED | Amazon | |
 |
2.54mm Straight Headers | Amazon | |
 |
2.54mm Right-Angle Headers | Amazon | |
 |
Female-Female jumper wire | Amazon | |
 |
1206 10k SMD Resistor * | Amazon | |
 |
BSS138 MOSFET * | Amazon |
If you are unable to find a Wemos D1 Mini s3, you can still buy an s2, as it is pin compatable. However, be advised the s2 has less memory and may experience occasional disconnects from the printer.
| Image | Hardware | Link 1 | Link 2 |
|---|---|---|---|
 |
Wemos D1 Mini S2 (Beware of Fakes!) | Amazon | AliExpress |
It is recommend to assemble OpenSpool using the custom PCB. You can send the Gerber files included in this repository to a PCB fabricator, such as OSH Park.
OpenSpool can be assembled without fabricating the custom PCB. In place of the MOSFET and resistor, you will need the following components:
| Image | Hardware | Link 1 | Link 2 |
|---|---|---|---|
 |
3.3v - 5v Logic Level Converter | Amazon | |
 |
Mini Breadboard | Amazon |
You can use any breadboard or splicing tool to connect the wires, however the linked mini breadboard is recommended as it is small enough to fit inside the enclosure.
Once you have all of the parts, you can begin assembly.
- Solder the following components onto the PCB:
- Two 10k resistors
- One BSS138 MOSFET
- Four sets of 8 straight headers, into the two pairs of columns on the top of the PCB
- One set of 8 right-angle headers into the row of vias just below the OpenSpool logo on the BACK side of the PCB
- Three right-angle headers in the top-left corner of the PCB
- Solder eight right-angle headers onto the top side of the PN532
- Solder three straight headers onto the LED. Make sure to solder them onto the side with the "Din" pin
- Place the Wemos D1 onto the headers and solder it on. The top of the Wemos D1 should face up, with the USB-C port facing the bottom of the PCB
- Use jumper wires to connect both the PN532 and the LED to their respective headers
- Flip the toggle switches on the PN532 to enable SPI mode (see image below)

If you are not using the custom PCB, you will need to connect the wires to each pin manually. Below is the wiring diagram:

The recommended method to install firmware is by navigating to openspool.io in Chrome/Edge and using the web based programming tool.
Alternatively the firmware can be installed with make commands as shown below.
brew install esphome

git clone https://github.com/spuder/OpenSpool
cd OpenSpool/firmware
Press and hold the D0 button while pressing the reset button on the Wemos D1 Mini.
A new USB serial device will appear.
ls /dev/cu*Upload firmware and restart
USB_ADDRESS=/dev/cu.usbmodemXXXXX make lolin_s2_minior
USB_ADDRESS=/dev/cu.usbmodemXXXXX make lolin_s3_miniA new Wi-Fi network will appear called OpenSpool, join the network, navigate to 192.168.4.1, insert your Wi-Fi credentials and reboot.
You can then navigate to the web interface at openspool-xxxxxx.local or IP address.
On first boot, you will need to specify your 3d printer IP Address, Serial Number and LAN Access Code.
Do not put your printer into LAN Only Mode, it is not required.

After changing these 3 settings, you will need to reboot the ESP32. Upon successful connection to the 3d printer, you will observe a checkmark next to MQTT in the web interface.

Press and hold the D0 button for 10 seconds. This will erase Wi-Fi credentials and Bambu access credentials from esp32.
This means the OpenSpool is hosting a wireless access point called 'OpenSpool'. Connect to it then navigate to 192.168.4.1 to configure Wi-Fi.
OpenSpool has successfully joined the Wi-Fi network and is ready to scan for RFID tags
If using the red NP5332 reader (smaller model), it detects tags best on the corners of the antenna.
If using the blue PN532 reader (larger model), it detects tags best directly in the center of the antenna.
Be sure you aren't using a counterfeit PN532
The A1/P1 have a limit of 4 mqtt connections. If more than 4 connections are reached clients may be asked to disconnect.
If a client attempts to write invalid data any mqtt topic, the printer will ask the client to disconnect.
All ESPhome resources must use state_topic: with a null value to prevent ESPhome from broadcasting on any topic.
Reach out to the discord for help to verify that the Root Certificate is correct.
Use the MQTTX client to observe the messages that OpenSpool and Bambu Printer are sending.
mqttx sub -t 'device/$SERIAL_NUMBER/report' -u bblp -P $LAN_ACCESS_CODE --mqtt-version 3.1.1 -h $IP_ADDRESS -p 8883 -l mqtts --insecure

Spencer Owen |

raihei |

Ember Light |

Queen Vinyl Da.i'gyu-Kazotetsu |

Tnthr |

Phillip Thelen |

Thijs Triemstra |

secprepper |
![]()


All contributions to the project are welcome. Skills needed:
- Software Development
- Photography
- Videography
- Documentation
- Electrical Design
- Testing/Integration
You can also donate to support research and development costs
